
The dig command, short for Domain Information Groper, is a highly versatile and helpful tool for network administrators and those working in the domain name system (DNS) realm. It allows you to query DNS servers for information about host addresses, mail exchanges, name servers, and other related DNS records.
This powerful command has many applications and can be used for various tasks, from simple DNS lookups to more advanced troubleshooting and analysis. This article will explore some of the most common use cases for the dig command and provide examples to illustrate its functionality.
Additionally, the nslookup command is a popular tool that can be used instead of the dig command. It has similar functionality and is usually easier to use, although it does not have the more advanced features offered by dig. You’ll find our guide on the subject very helpful if you want to learn how to use the nslookup command.
Installing Dig Command
If the dig command is not installed on your Linux distribution, you can quickly and easily install it using one of the below commands.
Debian and Debian-based Distros (Ubuntu, Linux Mint, Pop!_OS)
sudo apt install dnsutilsRed Hat and RHEL-based Distros (Fedora, CentOS Stream, AlmaLinux, Rocky Linux)
sudo dnf install bind-utilsArch Linux and Arch-based Distros (Manjaro, EndeavourOS, Garuda Linux)
sudo pacman -S dnsutilsopenSUSE
sudo zypper in bind-utilsDig Command Syntax
The basic syntax of the dig command is:
dig [@server] [name] [type]Code language: CSS (css)- @server: The hostname or IP address of the DNS server to which the request is directed. If no DNS server is specified,
diguses the DNS server that is currently configured for your system. - name: Specifies the domain name that is to be looked up.
- type: The type of DNS record to retrieve. If left blank,
digretrieves the A record type by default.
To give an example, to retrieve the MX record for the domain archlinux.org using the Google DNS server at 8.8.8.8, our dig command would be as follows:
dig @8.8.8.8 archlinux.org MXCode language: CSS (css)
Basic DNS Lookup with dig
When no other options are supplied, the dig command will display the A record by default in the ANSWER section.
dig archlinux.orgCode language: CSS (css)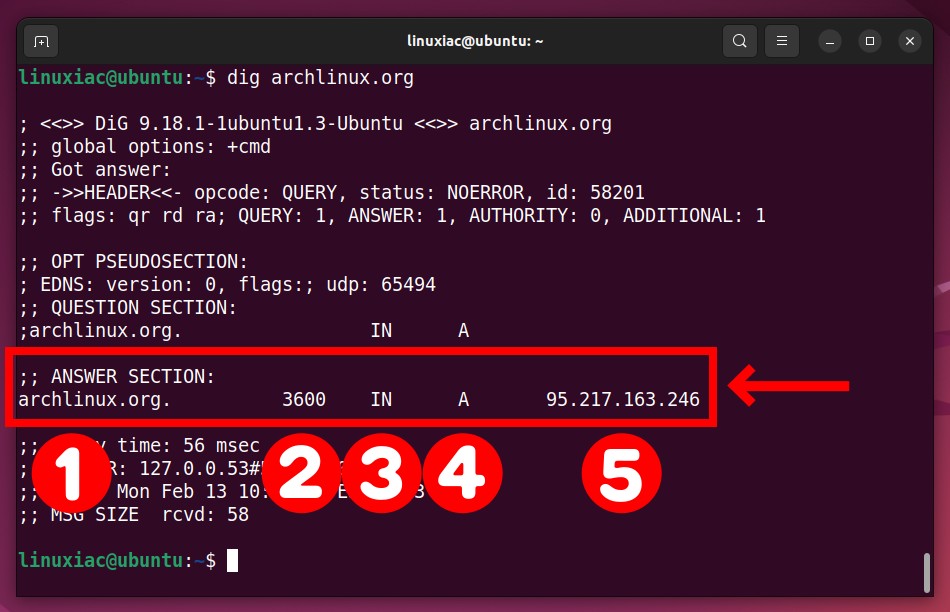
This section has five columns, each of which stands for:
- The domain name that is to be looked up.
- Time to live period – a setting that tells the DNS resolver how long to cache a query before requesting a new one.
- Class of the query – IN refers to the Internet.
- DNS query type – can be A, AAAA, CNAME, MX, NS, PTR, CERT, SRV, TXT, SOA, etc.
- The IP address associated with the domain name.
Remove the Comments from the DNS Query Answer
You can significantly reduce the amount of information returned to you by the dig command by adding the “+nocomments” option.
dig archlinux.org +nocommentsCode language: CSS (css)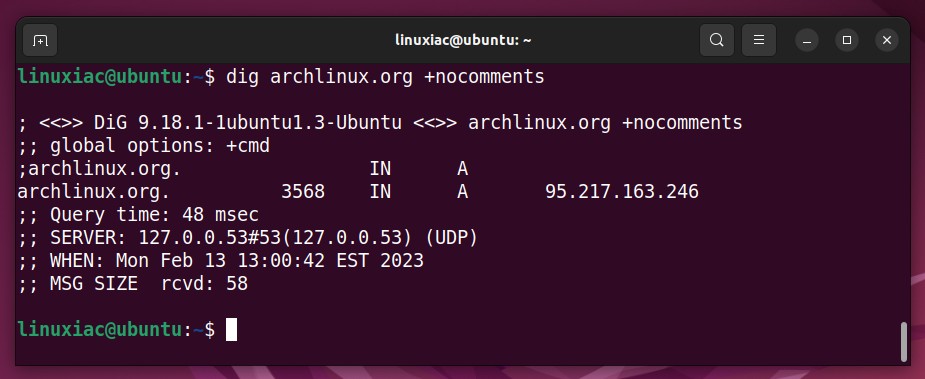
Query the Answers Section Only
Dig provides a simple way to focus solely on the ANSWER section. Combining the options “+noall,” which clears all display flags, and “+answer,” which includes the ANSWER section in the query response, yields a clean and easy-to-read result.
dig archlinux.org +noall +answerCode language: CSS (css)
Return Only the Address in a Reply
We can further simplify the returned result by adding the “+short” option to remove any additional information from the response to our dig query and get back only the address.
dig archlinux.org +shortCode language: CSS (css)
Specifying DNS Server
By default, dig sends queries to the DNS server specified as the default for use locally on your Linux system. Sometimes, however, you may want to send the query to a DNS server other than your default. To do so, use the syntax “@server,” where “server” is the IP address or name of the DNS server.
For example, to send a query to the Google DNS server that has an IP address of 8.8.8.8, type:
dig @8.8.8.8 archlinux.orgCode language: CSS (css)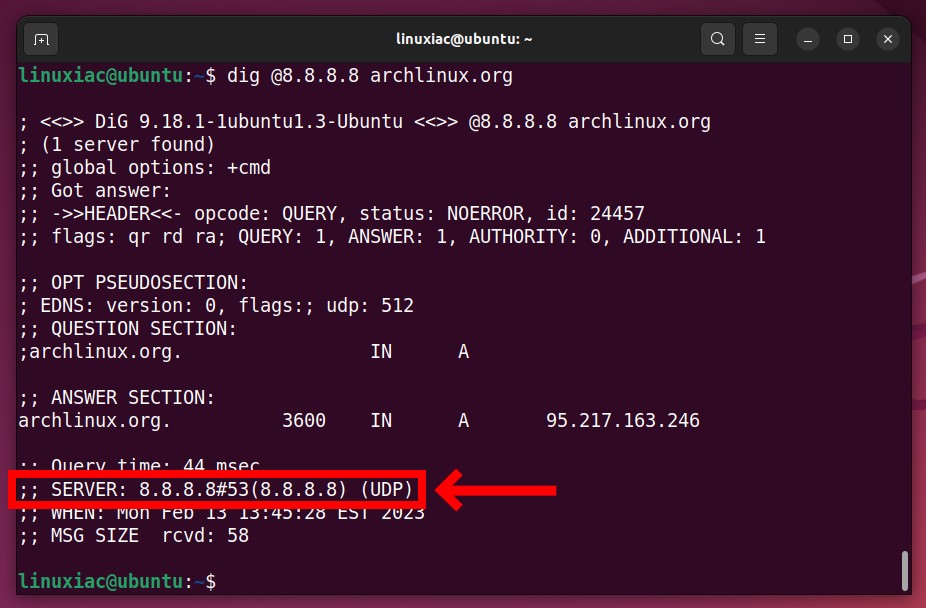
Search for Specific Record Type with dig
DNS record types vary, the most common being A, CNAME, MX, NS, TXT, etc. Their complete list is available here. In addition, you can use the dig command to search for a specific DNS record type by adding its name to the end of the command.
For example, to obtain information about the MX (Mail Exchanger) record, type:
dig archlinux.org MXCode language: CSS (css)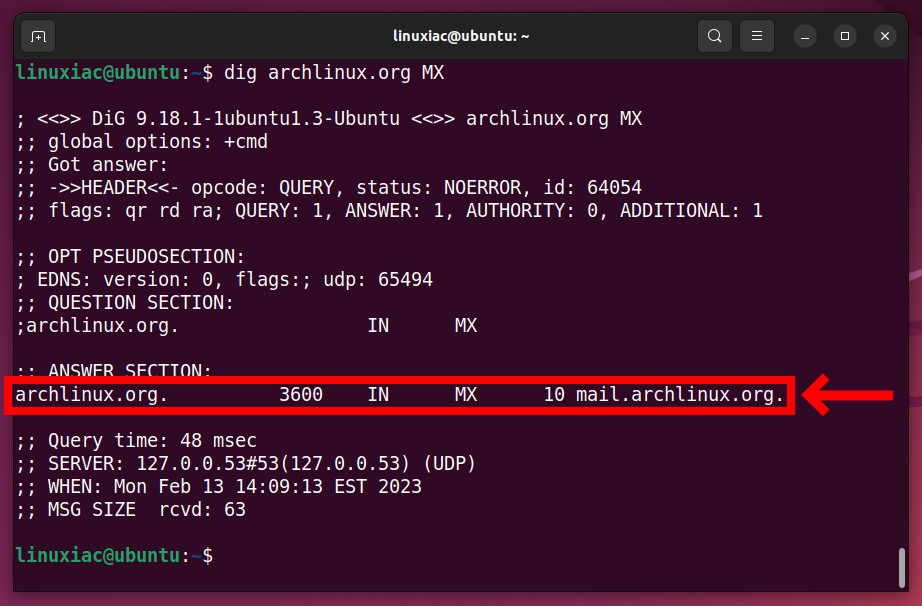
Quite similarly, you can send requests for other DNS record types.
dig archlinux.org NS
dig archlinux.org TXT
dig archlinux.org SOA
dig archlinux.org PTR
dig archlinux.org AAAACode language: CSS (css)
Or get all records together using the special keyword “ALL. “
dig archlinux.org ALLCode language: CSS (css)Trace DNS Path with the dig Command
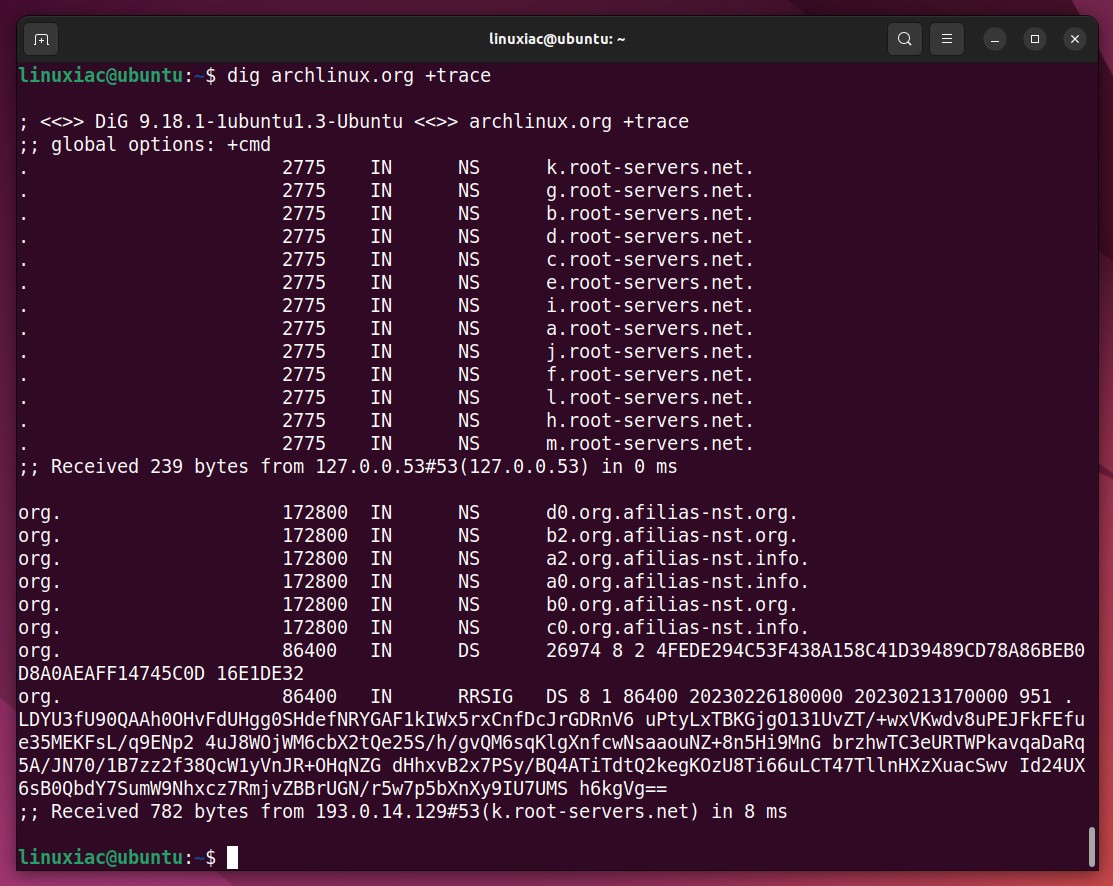
If you are unsure where a misconfiguration may be causing an issue, you can do a “+trace” to see what is happening at each step of the lookup process.
Reverse DNS Lookup with dig
To look up a domain name by its IP address, use the dig’s “-x” option. This option sets simplified reverse DNS lookups for mapping addresses to names. The address can be an IPv4 address in dotted-decimal notation or a colon-delimited IPv6 address.
In the following example, dig will run a reverse DNS query for the IP address associated with archlinux.org.
dig -x 95.217.163.246Code language: CSS (css)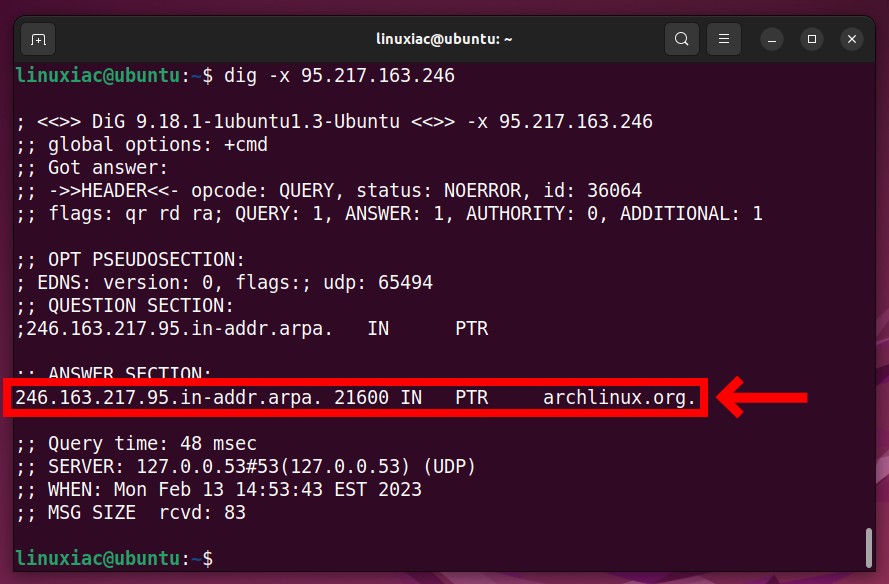
Multiple dig Queries at Once
Instead of doing a dig query for each domain separately, you may use dig to perform a DNS lookup for a list of domains (batch queries). To do so, insert the domain names in a text file, one per line, and run the dig query on the file using the “-f” option.
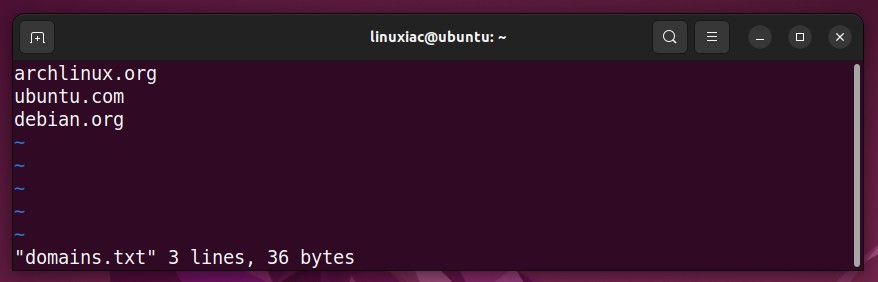
We’ve also added the “+short” option to display query results conveniently.
dig -f domains.txt +shortCode language: CSS (css)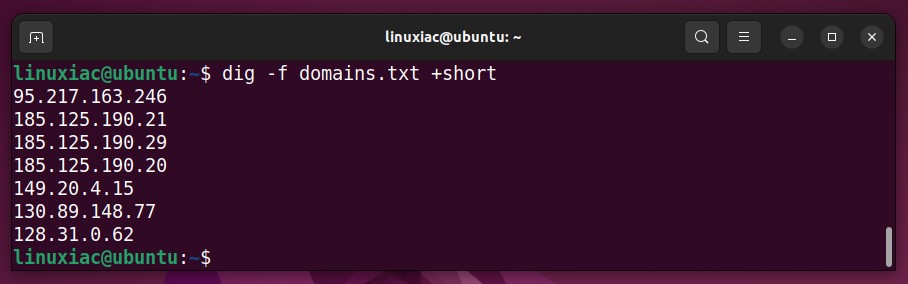
Adjust Default dig Options
It can be annoying to write the dig command with the same options repeatedly if we use it frequently. Fortunately, the “~/.digrc” file allows us to redefine all the default values with which the command is executed so that we don’t have to write them every time.
Assume you want dig always to show you the query output with the comments removed by default. Create a “.digrc” file in your home directory and add the appropriate option, in this example, “+nocomments,” to it. If you want to include more options, place them one after the other on a separate line.
vim ~/.digrc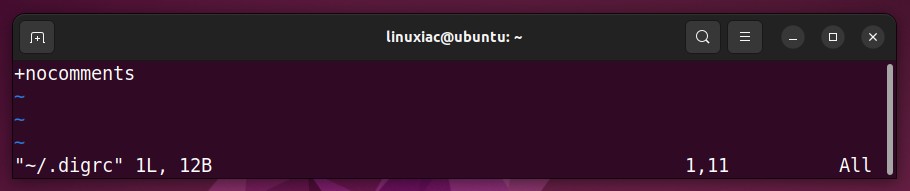
Save the file and exit. The next time you run the dig command without any other options, you will only get the short answer to your DNS query.
dig archlinux.orgCode language: CSS (css)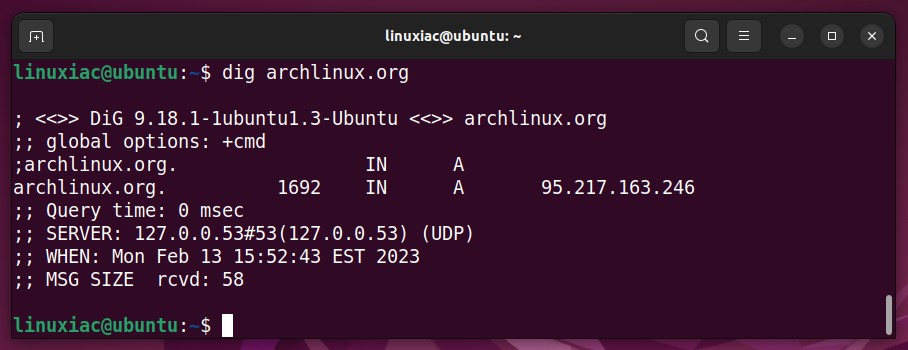
Conclusion
The dig command is a valuable asset for system administrators and network engineers, from basic queries to complex ones. Whether you’re troubleshooting DNS issues, researching domain names, or simply checking the information of a specific website, the dig command offers a versatile solution. With numerous options and flags, you can tailor the output to meet your needs and extract the required information.
In this article, we’ve covered the most frequent use of the dig command to query DNS servers. We hope we have been of help to you. You can find more information regarding dig on its manual page.
Please feel free to leave your comments, suggestions, and additions in the section below.


the type “ALL” does not seem to work `dig archlinux.org ALL` at least for me with (Version DiG 9.18.18-0ubuntu0.22.04.2-Ubuntu). Cant find it in any other docu though. Is this made up?
Tested and proven to work on Ubuntu (22.04 LTS).
Best,
Bobby