Are you tired of relying on your phone for reminders or alarms? Setting the alarm on your computer can be just as convenient, if not more so. In addition, you can set multiple alarms at once and have the bonus of not having to worry about your phone battery dying or losing your phone.
In this article, I will show you how to set clock alarms on Linux, both from the command line and through a graphical user interface (GUI). This guide is intended for users of all levels of experience, so whether you are a power user who prefers the command line or a beginner who likes a GUI, we have you covered.
Setting an Alarm on Linux Using the at Command
The at command is a Linux command-line utility that is used to schedule a job to run at a specific time. However, unlike the cron job, which offers similar functionality, jobs created with the at command are executed only once.
Since the at tool is not installed by default in most Linux distributions, we need to add it first. Here’s how to do it for most of the more popular ones.
Ubuntu / Debian / Linux Mint
sudo apt install atFedora / AlmaLinux / Rocky Linux
sudo dnf install atArch Linux / Manjaro
sudo pacman -S atThen, please verify that the atd service is enabled and running, as the at command depends on it.
sudo systemctl status atd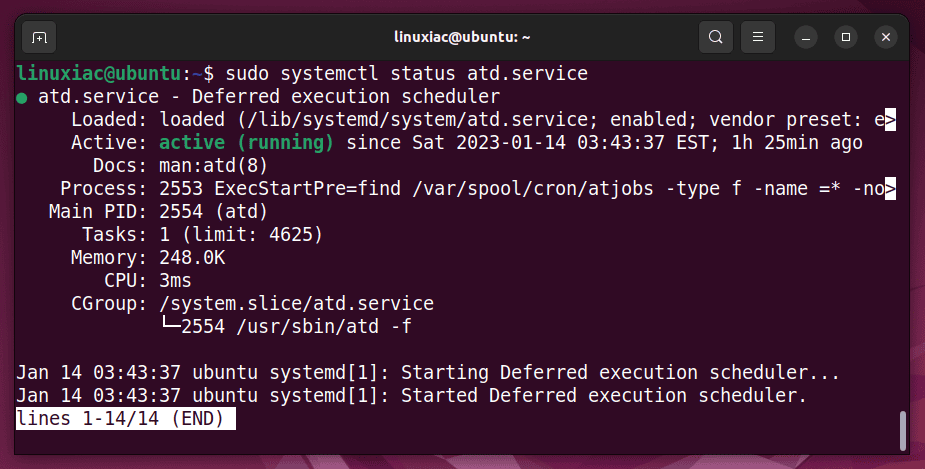
If it is not, you can activate and run it by running the two commands shown below.
sudo systemctl enable atd
sudo systemctl start atd
So far, so good. We can now move on to setting the alarm using the at command. The syntax is simple. Type at, followed by when you want the specific action to execute. Here are some examples:
Schedule the job to be executed after 10 minutes:
at now +10 minutesSchedule the job to be executed at a specific time:
at 14:00
at 2:00 pmCode language: CSS (css)
Schedule the job to be executed at 07:30 AM on January 18.
at 7:30 January 18Code language: CSS (css)Schedule the job to be executed at 2:00 PM tomorrow.
at 2:00 pm tomorrowCode language: CSS (css)I hope you get the picture. Use the “HH:MM” format to specify a time. Use “am” or “pm” after the time to indicate a 12-hour time format. On top of that, the date can be specified using the month name followed by the day. Furthermore, at accepts “now+ interval” increments, where the interval is a number and can be followed by one of the following strings: “minutes,” “hours,” “days,” or “weeks.”
Let’s now move on to setting the alarm on Linux. To achieve this, we will use the VLC media player in headless mode (no GUI) and instruct it to play a given media file at a specific time. So, if you don’t have VLC on your Linux system, install it.
We’ll set the alarm for 7:30 am. Then, when you enter the required command at 7:30, you will be taken to the at command-line interface, which allows you to enter the command to be run at the specified time. In this case, that would be:
vlc --intf dummy alarm.mp3Code language: CSS (css)Of course, specify the full path if the media file is located somewhere other than your main home directory.
When you’re ready, hit “Enter,” then press the keyboard shortcut “Ctrl + D” to save your job and exit.

To see all scheduled at jobs, type:
at -l
You will be shown the unique ID for each job, the date and time it is scheduled to run, and the user it will run with. To delete a job, type at -r followed by its unique ID number.
at -r 3You can see a complete listing of the options for the at command on the Linux man pages.
Setting an Alarm on Linux Using the sleep Command
On Linux, the sleep command pauses the execution of shell scripts or commands for a specified time. Therefore, this makes it an ideal candidate for setting alarms in Linux.
However, here you don’t have the flexibility that the at command provides. All you can do is specify how long an action should be triggered after. In addition, you can set the delay time in seconds (s), minutes (m), hours (h), and days (d).
So, to set an alarm, you must first calculate how far forward from the current time it should occur. Furthermore, the terminal window in which the sleep command was executed must stay open. Closing it will result in the command being aborted and the set alarm failing.
To set an alarm on Linux using the sleep command that will start the VLC player playing a media file after 8 hours, type:
sleep 8h && vlc --intf dummy alarm.mp3Code language: CSS (css)
That’s it. Remember that you should not close the terminal window. Similarly, if you want the alarm to play after 20 minutes, the command would be as follows:
sleep 20m && vlc --intf dummy alarm.mp3Code language: CSS (css)You can see a complete listing of the options for the sleep command on the Linux man pages.
Setting an Alarm in GNOME via GNOME Clocks
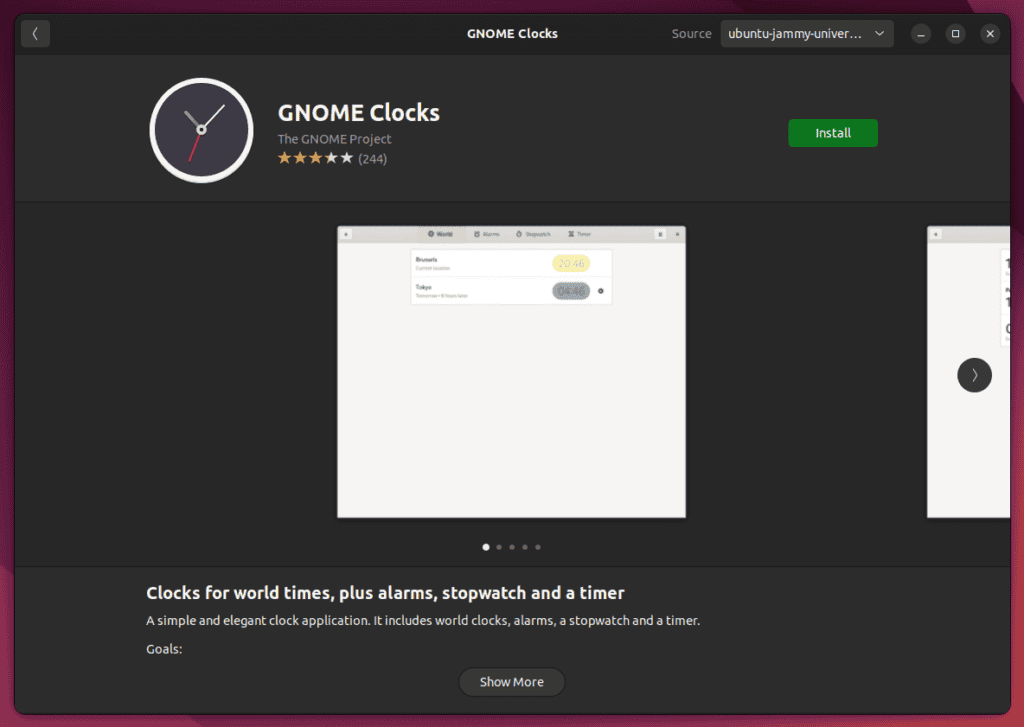
You can use the built-in GNOME Clocks app to set an alarm through the GNOME desktop environment. If you don’t already have it, you can easily get it by installing it from the Software Center of the distribution you’re using.
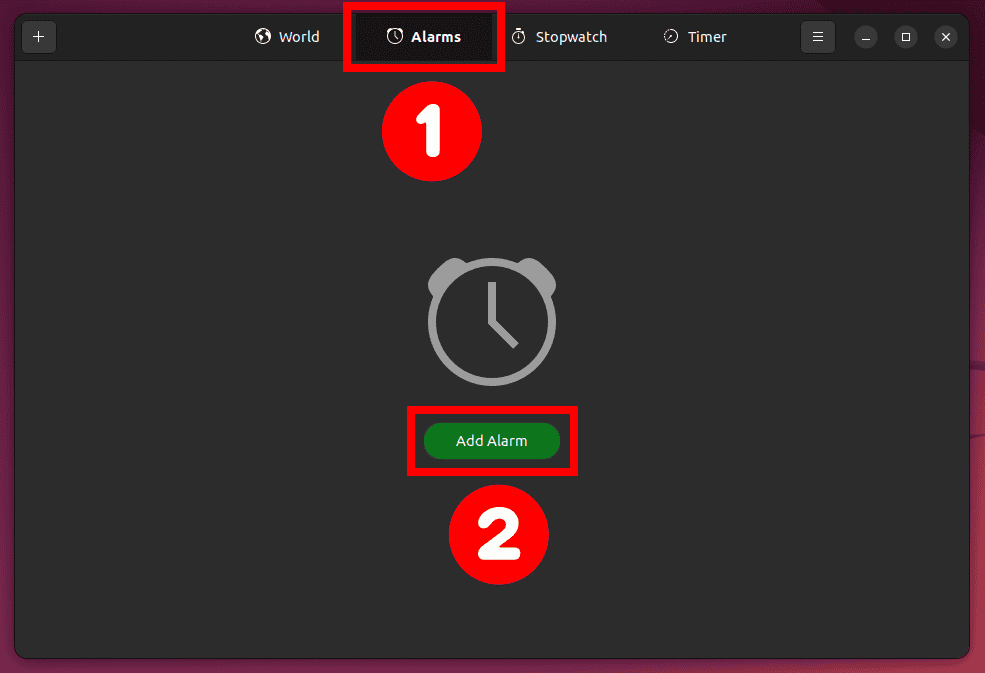
Then open the app, select the “Alarms” tab, and hit the “Add Alarm” button.
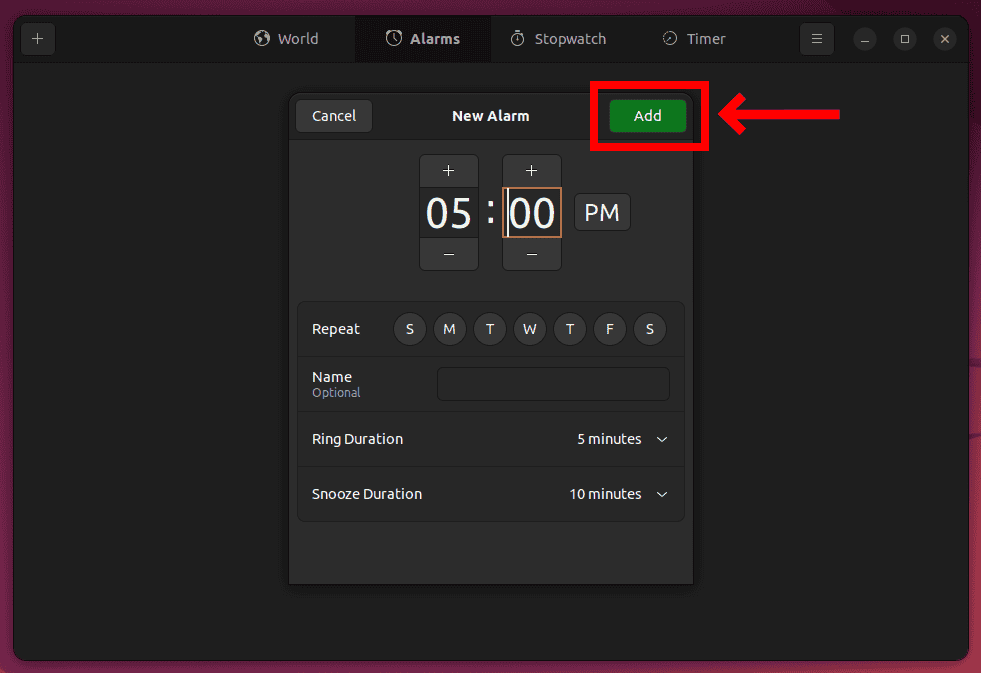
All that is left is to set the alarm’s time, frequency, and duration, then add it by pressing the “Add” button.
The drawback is that the application does not allow you to select your media file for play, and the default one may differ from everyone’s liking.
Setting an Alarm in KDE via KAlarm
KDE Plasma allows you to set an alarm via the KAlarm application. Here you have a rich set of customization options, entirely in the spirit of the Plasma desktop’s goal of providing the user with as many options as possible.
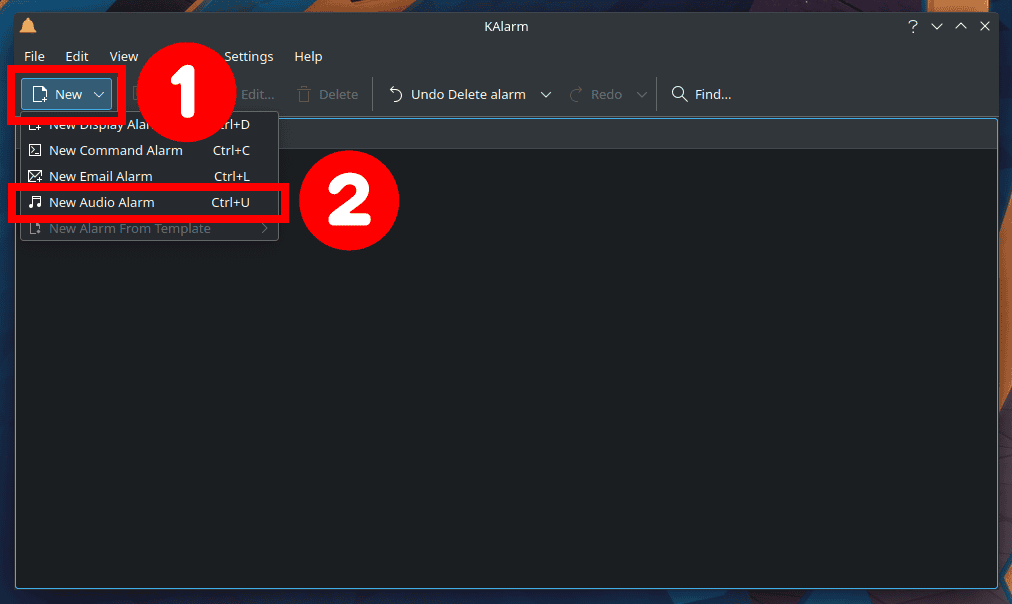
To set a new alarm, open the app and select “New Audio Alarm” from the “New” menu.
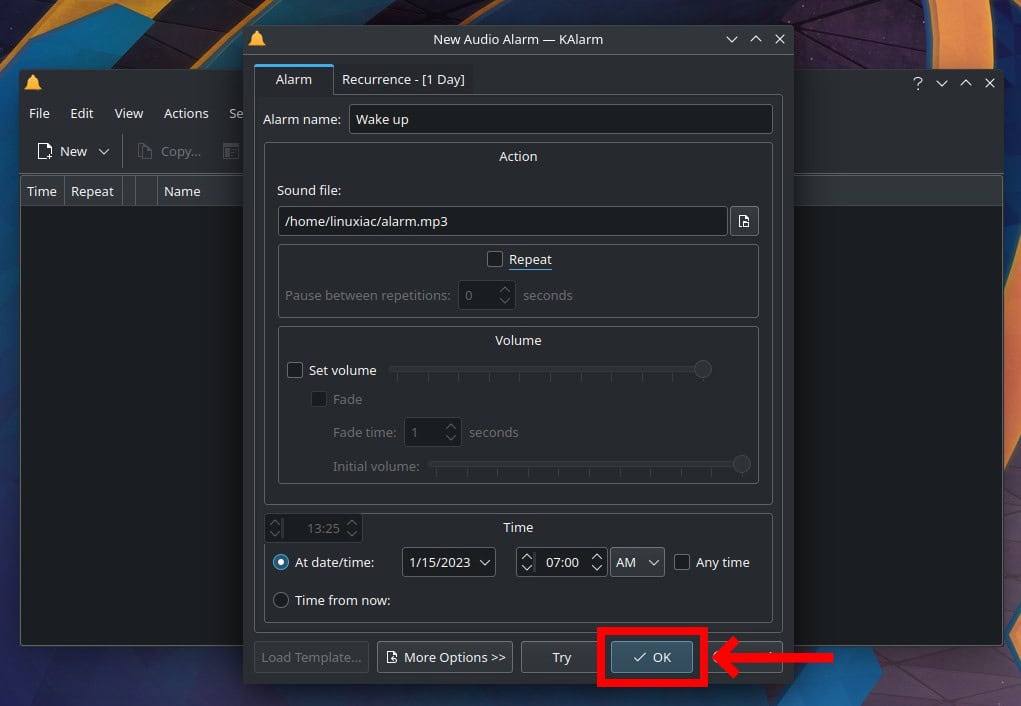
Set all necessary settings based on your needs and preferences, then confirm the alarm by pressing the “OK” button. Furthermore, by clicking on “Try,” you can try it out ahead of time.
Conclusion
Setting reminders or wake-up alarms on a Linux can be done easily using various built-in and third-party tools. The command line tools as at and sleep and the GUI ones as GNOME Clocks and KAlarm are just a few examples of ways to set alarms on a Linux system.
I hope you found this guide helpful. Any suggestions and comments are welcome in the section below.
