This guide is tailored specifically for Ubuntu 24.04 LTS (Noble Numbat) users, the latest long-term support release from one of the most popular Linux distributions. Following our simple step-by-step instructions, you can install VirtualBox seamlessly on your Ubuntu system in no time.
VirtualBox is a powerful yet free virtualization software, quite popular among home users. It is available for installation in the Ubuntu 24.04 repositories, but the version is often not current. Because of this, I will walk you through the steps to install it directly from the official VirtualBox repository.
This ensures you always have the latest version, and the best part is that updates will be included with your regular Ubuntu system updates. So let’s get started.
Install VirtualBox on Ubuntu 24.04 LTS
Step 1: Import VirtualBox’s Repo GPG Key
First, we’ll import the GPG key from the VirtualBox repository to ensure the authenticity of the software we install from it.
wget -O- https://www.virtualbox.org/download/oracle_vbox_2016.asc | sudo gpg --dearmor --yes --output /usr/share/keyrings/oracle-virtualbox-2016.gpgCode language: Bash (bash)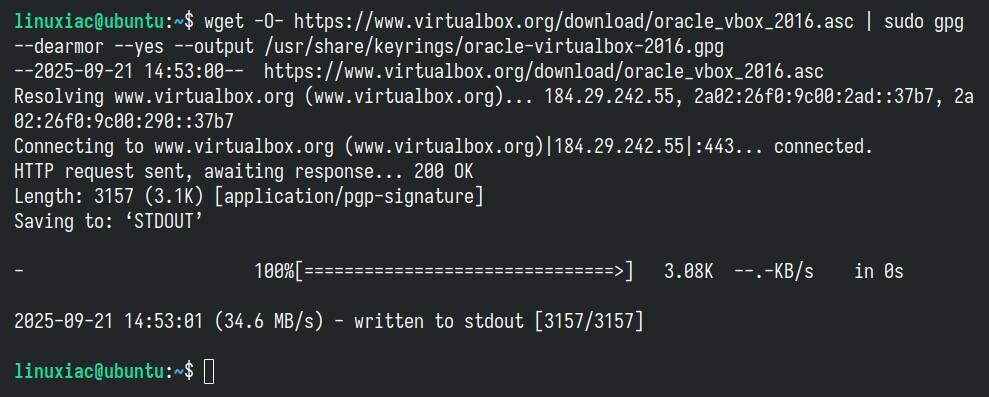
Step 2: Add VirtualBox Repository
Next, we’ll add the official VirtualBox repository to our Ubuntu 22.04 system. If a new version is released, the update package will be made available with the rest of your system’s regular updates.
echo "deb [arch=amd64 signed-by=/usr/share/keyrings/oracle-virtualbox-2016.gpg] http://download.virtualbox.org/virtualbox/debian $(. /etc/os-release && echo "$VERSION_CODENAME") contrib" | sudo tee /etc/apt/sources.list.d/virtualbox.listCode language: Bash (bash)
Step 3: Run System Update
Before we proceed with VirtualBox installation on our Ubuntu 24.04 system, we should refresh the list of available packages. Run the command below to update the APT repositories index.
sudo apt updateCode language: Bash (bash)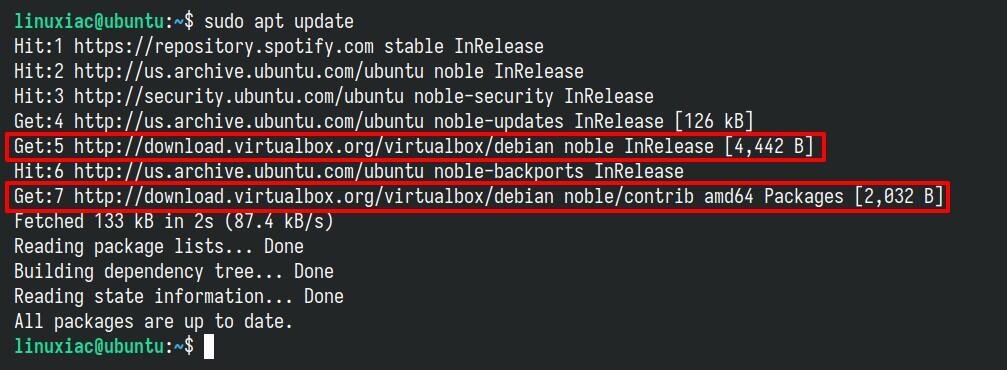
As you can see, our new VirtualBox repository is now available and ready to be used.
Step 4: Install VirtualBox 7.2 on Ubuntu 24.04 LTS
We’re all set to install VirtualBox on our Ubuntu 24.04 system. Run the following commands:
sudo apt install virtualbox-7.2Code language: Bash (bash)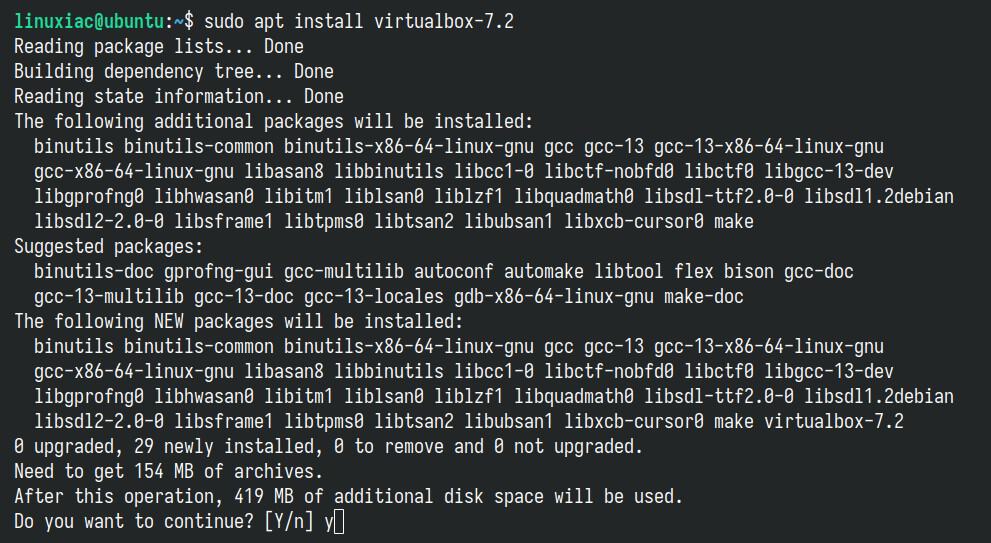
Hit “Enter” and wait for the installation to complete. Congratulations, we are done! But hold on before you run it—we have a few small but important things to take care of first.
Install VirtualBox Extension Pack
This is an optional step, but I strongly encourage it because it will make working with VirtualBox on your Ubuntu system easier and more convenient. VirtualBox Extension Pack unlocks many great features, such as:
- USB 2 and USB 3 support
- VirtualBox Remote Desktop Protocol (VRDP)
- Host webcam passthrough
- Disk image encryption with the AES algorithm
- Intel PXE boot ROM
- Support for NVMe SSDs
Let’s highlight one peculiarity here. The Extension Pack’s version is strongly recommended to match the VirtualBox’s installed version. To verify the exact one of the just-installed VirtualBox, you can use a built-in vboxmanage command:
vboxmanage -v | cut -dr -f1Code language: Bash (bash)
As you can see, the installed version of VirtualBox is “7.2.2.” Therefore, you must then download the Extension Pack with the same version. So, use the below wget command to download the appropriate Extension Pack for VirtualBox.
However, if your installation’s version is different, replace both places containing “7.2.2” in the command below with the appropriate version. You can also visit the downloads page and look at the available versions.
wget https://download.virtualbox.org/virtualbox/7.2.2/Oracle_VirtualBox_Extension_Pack-7.2.2.vbox-extpackCode language: Bash (bash)Next, to install the VirtualBox Extension pack, run the vboxmanage command as follows:
sudo vboxmanage extpack install Oracle_VirtualBox_Extension_Pack-7.2.2.vbox-extpackCode language: Bash (bash)You will be prompted to agree to Oracle’s license terms and conditions. To confirm, type “y” and press “Enter.”
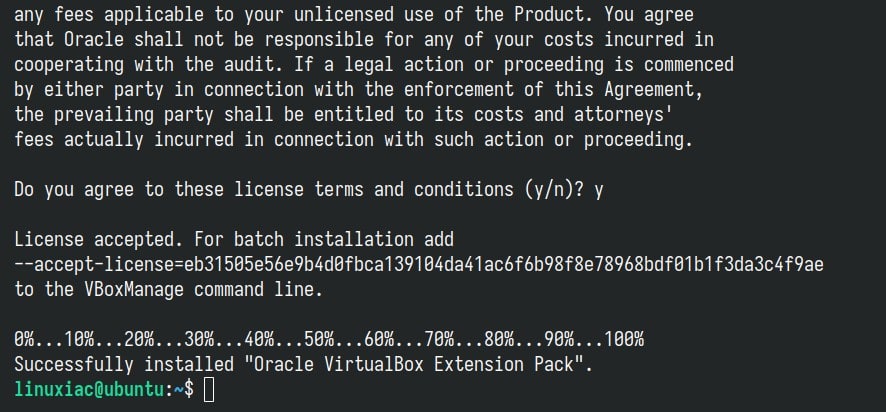
Additionally, you can verify the installed VirtualBox extension pack version by running the following:
vboxmanage list extpacksCode language: Bash (bash)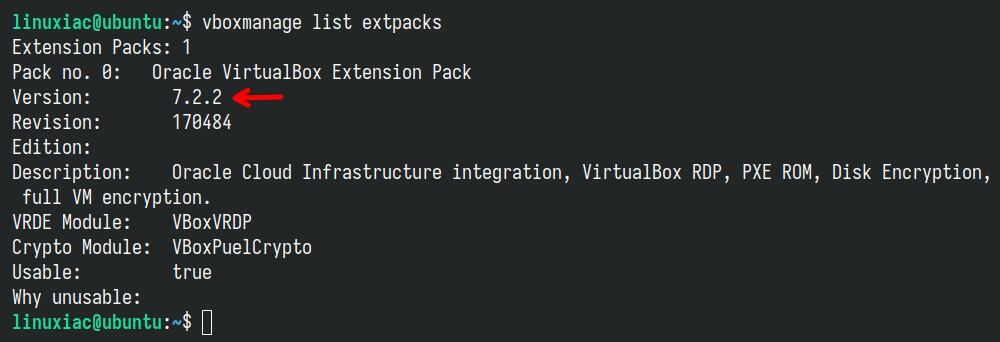
Add User to vboxusers Group
Before using VirtualBox, add your user account to the “vboxusers” group. This is quick and simple to accomplish by running:
sudo usermod -aG vboxusers $USERCode language: Bash (bash)Now, perform a reboot. After login, check that you are in the “vboxusers” group with this command:
groups $USERCode language: Bash (bash)
Running VirtualBox on Ubuntu 24.04
You can start using VirtualBox by launching it from the Ubuntu Dash. Search for “virtualbox” and launch it when its icon appears.

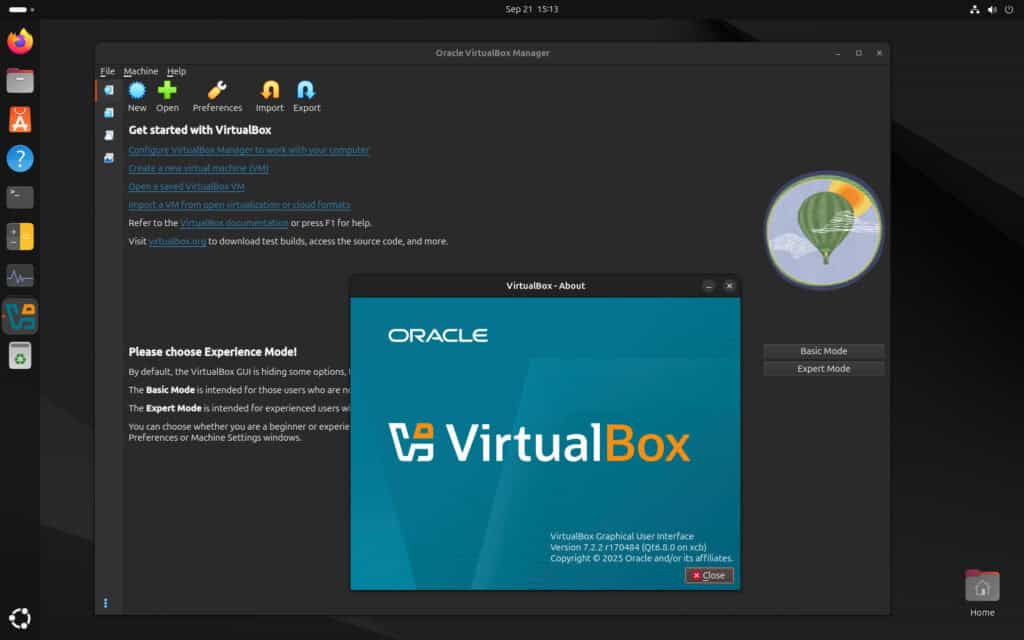
Hit the “New” button and start virtualizing your ideas!
How to Uninstall VirtualBox
If you want to uninstall VirtualBox from your Ubuntu system for some reason, you can easily do so by running the command below.
sudo apt purge VirtualBox-7.2Code language: Bash (bash)Then, additionally, you can also “clean” your system from unnecessary package dependencies and finally remove the VirtualBox repository itself from the list of available ones.
sudo apt autoremove
sudo rm /etc/apt/sources.list.d/virtualbox.listCode language: Bash (bash)
Conclusion
Now, with VirtualBox installed on your Ubuntu 24.04 system, you are well equipped to run multiple operating systems and test applications in safe, isolated environments.
However, VirtualBox isn’t the only player in the virtualization game—VMware Workstation is another excellent and reliable option. If you’re thinking about giving it a try, we’ve got you covered with a step-by-step guide on setting it up in Ubuntu 24.04LTS.
Finally, I recommend checking the official documentation for individuals who want to learn more about VirtualBox’s features and how to use them effectively.
I hope this guide has been informative and helpful in getting you started with VirtualBox on Ubuntu. Thanks for your time! Your feedback and comments are most welcome. Happy virtualizing!

Thank you very much…this solved my bunch of Problems👍
I had to use curl -fsSL in place of the wget command
cheers
ref: as guided by https://www.centron.de/en/tutorial/how-to-handle-apt-key-and-add-apt-repository-deprecation-on-ubuntu-22-04-with-gpg/
c’est super ça marche du tonnerre !
love u
xoxo
Excellent Step by Step installation Thank You.
Think you!!!
Thank you! This totally helped!
This is top end guide
I have used VirtualBox in the past, however was having difficulty getting a good installation on Ubuntu 24.04.1. Your guide went as smoothly as I could only hope for. Thank you for the excellent guide.
Eine ausgezeichnete Schritt-für-Schritt Anleitung. Ohne Fehlermeldungen gelang es, die Virtualbox Version 7.1.6 einschließlich Extension Pack in Ubuntu 24.04.1 zu installieren.
Thank you, Bobby! These are the best step-by-step instructions I've found.Anyway, I face an issue with lib pt6:
Die folgenden Pakete haben unerfüllte Abhängigkeiten: virtualbox-7.1 : Hängt ab von: libqt6core6t64 (>= 6.4.0) ist aber nicht installierbar Hängt ab von: libqt6dbus6t64 (>= 6.1.2) ist aber nicht installierbar Hängt ab von: libqt6gui6t64 (>= 6.4.0) ist aber nicht installierbar Hängt ab von: libqt6help6 (>= 6.2.2) ist aber nicht installierbar Hängt ab von: libqt6printsupport6t64 (>= 6.1.2) ist aber nicht installierbar Hängt ab von: libqt6statemachine6 (>= 6.2.1) ist aber nicht installierbar Hängt ab von: libqt6widgets6t64 (>= 6.3.0) ist aber nicht installierbar Hängt ab von: libqt6xml6t64 (>= 6.1.2) ist aber nicht installierbar Empfiehlt: libsdl-ttf2.0-0 ist aber nicht installierbar
Could you please give me a clue?
Geez, I found it: An unticked box for community software …
Nice, thanks a bunch. The only instructions I have tried that work. I had had VirtualBox running on my system with Secure Boot enabled, but this went to shit after BIOS update. Neither 24.04 Canonical official repo nor Oracle package and their instructions worked. The only thing that's missing here are instructions for signing modules, but this can be found elsewhere like AskUbuntu, ChatGPT etc.
Outstanding step-by-step instructions.
great tutorial. Oracle should learn from you.
perfect – thanx for your wonderful guide
Wonderful!. Thank you!!
Very good. One minor detail: "vboxmanage list extpacks" closed with errors before reboot as instructed here; after reboot everything worked fine.
Many thanks, Thanks a lot
Bobby, many thanks for a fantastic step by step guide on how to install VirtualBox. You are a life saver.
Sehr gut. 🙂
Very nice article. Thank you for the step by step guide! 😉
Outstanding step-by-step instructions. I was nervous as I followed, but was rewarded with a successful installation. Thank you Bobby!
The best Virtualbox installation guide I have followed so far. Very straight to the point, and easy to follow.
thanks m8
Thank you, well written and great timing.
Thank you so much!!!
ty