VirtualBox is one of the most popular and widely used virtualization tools, and it remains a favorite among Linux users. If you’re running Debian 13 “Trixie” and looking for a straightforward way to install it, well… you’re in the right place.
In this guide, I’ll walk you through simple, proven step-by-step instructions for installing VirtualBox on Debian 13. In just a few minutes, you’ll be all set to start creating and running your first virtual machines. So, let’s get started.
Install VirtualBox on Debian 13 “Trixie”
VirtualBox isn’t included in the official Debian repositories because of licensing and maintenance reasons. But don’t worry—you can still get it. Here I’ll show you how to install it directly from the official VirtualBox repository.
Step 1: Import VirtualBox’s Repo GPG Key
First, we’ll import the GPG key from the VirtualBox repository to ensure the authenticity of the software we install from it.
wget -O- -q https://www.virtualbox.org/download/oracle_vbox_2016.asc | sudo gpg --dearmour -o /usr/share/keyrings/oracle_vbox_2016.gpgCode language: Bash (bash)
Notice that the command produces no output.
Step 2: Add VirtualBox Repository for Debian 13
Next, we’ll add the official VirtualBox repository to our Debian 13 system. This way, if a new version is released, the update package will be made available with the rest of your system’s regular updates.
echo "deb [arch=amd64 signed-by=/usr/share/keyrings/oracle_vbox_2016.gpg] http://download.virtualbox.org/virtualbox/debian trixie contrib" | sudo tee /etc/apt/sources.list.d/virtualbox.listCode language: Bash (bash)
Step 3: Run System Update
Before we proceed with VirtualBox installation on our Trixie system, we should refresh the list of available packages. Run the command below to update the APT repositories index.
sudo apt updateCode language: Bash (bash)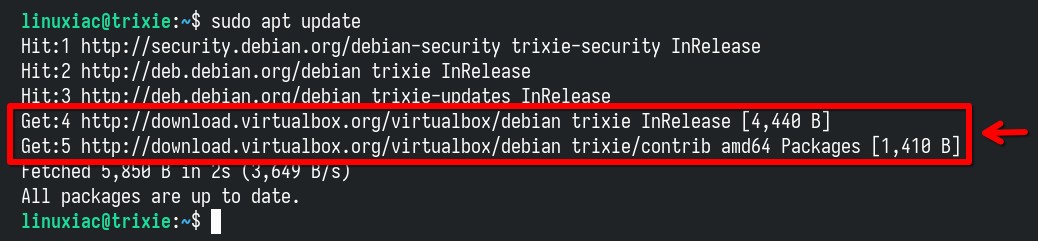
As you can see, our new VirtualBox repository is now available and ready for use.
Step 4: Install VirtualBox on Debian 13 “Trixie”
We’re all set to install the most up-to-date VirtualBox release on our Debian 13 system. Run the following commands:
sudo apt install virtualbox-7.2Code language: Bash (bash)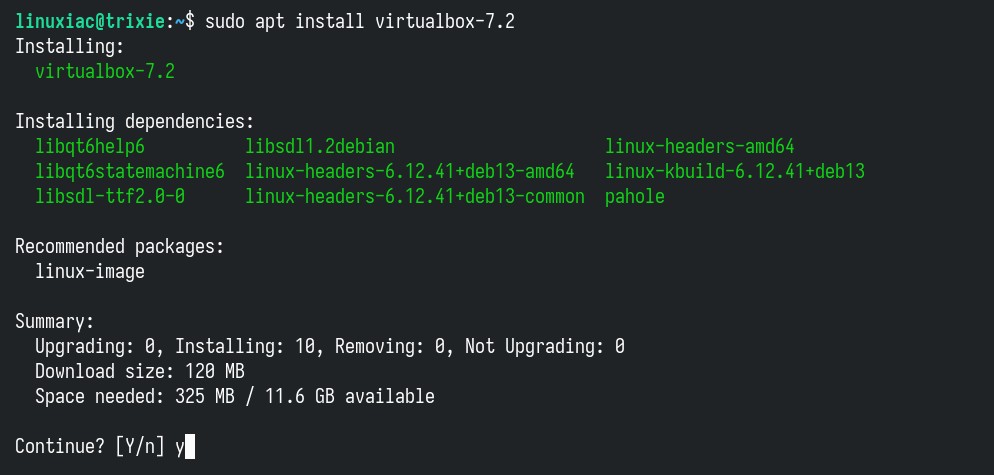
Wait for the installation to complete. Congratulations, we are done! But hold on before you run it—we have a few small but important things to take care of first.
Install VirtualBox Extension Pack
Although this is an optional step, I strongly encourage it because it will make working with VirtualBox on your Debian system easier and more convenient. VirtualBox Extension Pack unlocks many great features, such as:
- USB 2 and USB 3 support
- VirtualBox Remote Desktop Protocol (VRDP)
- Host webcam passthrough
- Disk image encryption with the AES algorithm
- Intel PXE boot ROM
- Support for NVMe SSDs
However, one peculiarity should be highlighted here. The Extension Pack’s version is recommended to match the version of VirtualBox installed on your Debian 13 system. To verify the exact one of the just-installed VirtualBox, you can use a built-in vboxmanage command:
vboxmanage -v | cut -dr -f1Code language: Bash (bash)
As you can see, the installed version of VirtualBox is “7.2.0.” Therefore, you need to download the Extension Pack with the same version. Use the wget command below to download the appropriate Extension Pack for VirtualBox.
However, if your installation’s version differs, replace both instances of “7.2.0” in the command below with the corresponding version. You can also visit the downloads page to view the available releases.
wget https://download.virtualbox.org/virtualbox/7.2.0/Oracle_VirtualBox_Extension_Pack-7.2.0.vbox-extpackCode language: Bash (bash)Next, to install the VirtualBox Extension pack, run the vboxmanage command as follows:
sudo vboxmanage extpack install Oracle_VirtualBox_Extension_Pack-7.2.0.vbox-extpackCode language: Bash (bash)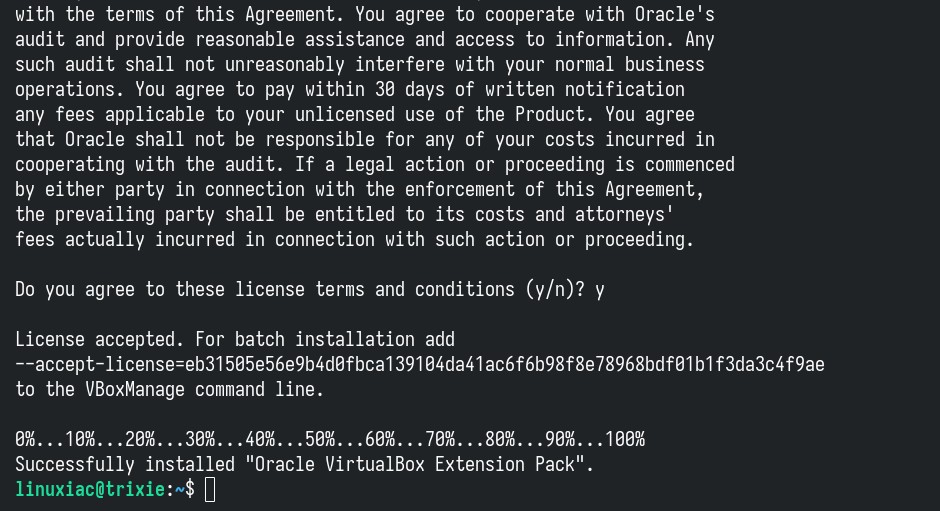
Additionally, you can verify the installed VirtualBox extension pack version by running the following:
vboxmanage list extpacksCode language: Bash (bash)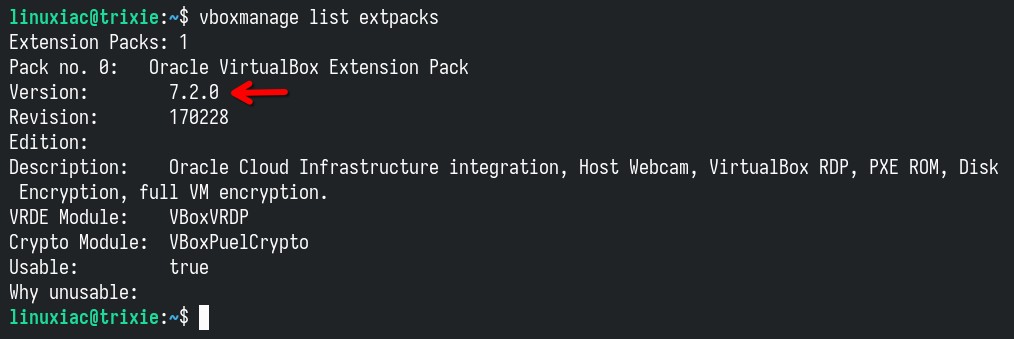
Add User to vboxusers Group
And one final touch. Before using VirtualBox, add your user account to the “vboxusers” group. This is quick and simple to accomplish by running:
sudo usermod -aG vboxusers $USERCode language: Bash (bash)Now, perform a reboot. After login, check that you are in the “vboxusers” group with this command:
groups $USERCode language: Bash (bash)
Running VirtualBox on Debian 13 “Trixie”
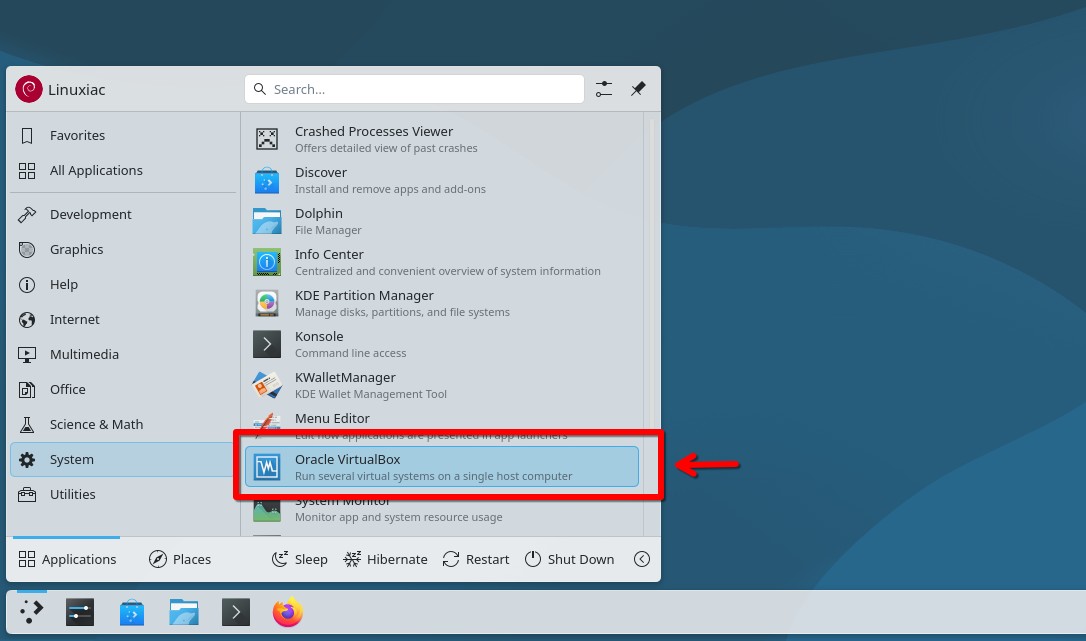
You can start using VirtualBox by launching it from the desktop environment’s application menu.
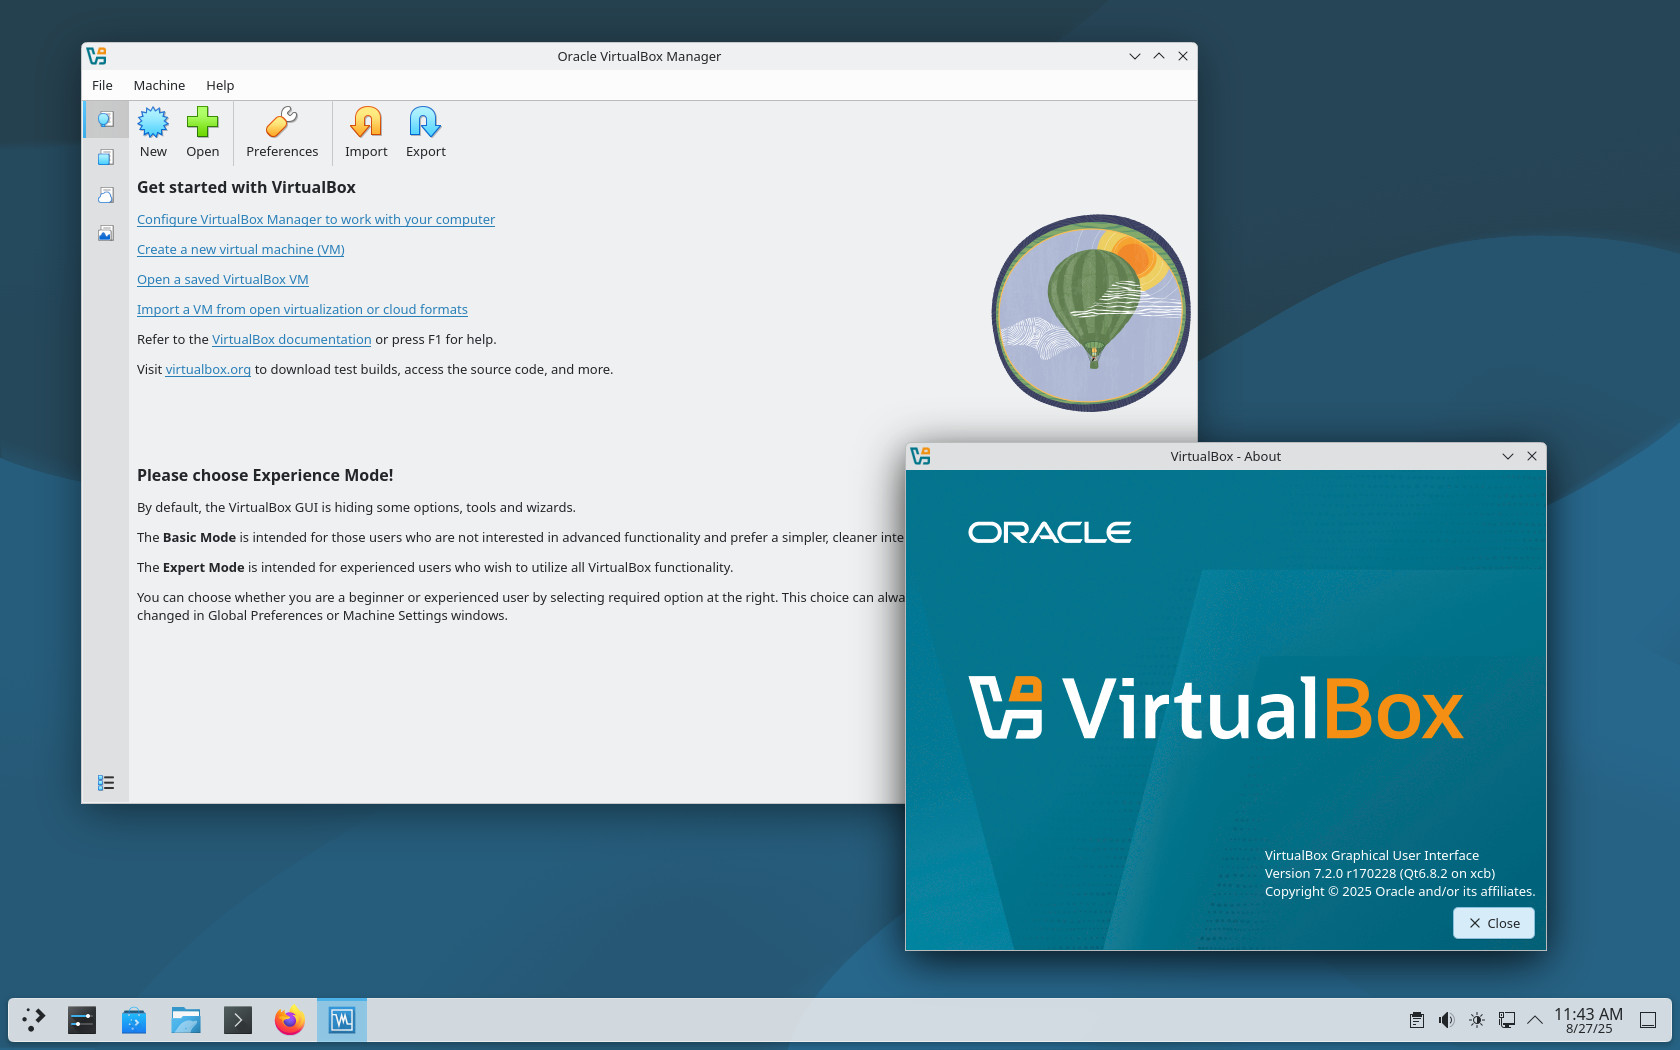
Hit the “New” button and start virtualizing your ideas.
How to Uninstall VirtualBox
If you want to uninstall VirtualBox from your Debian 13 box for any reason, you can easily do so by running the command below.
sudo apt purge virtualbox-7.2Code language: Bash (bash)Then, additionally, you can also “clean” your system from unnecessary package dependencies and finally remove the VirtualBox repository itself from the list of available ones.
sudo apt autoremove
sudo rm /etc/apt/sources.list.d/virtualbox.listCode language: Bash (bash)
Conclusion
That’s it, folks! With VirtualBox up and running on your Debian 13 system, you’re ready to dive in and start bringing your virtualization ideas to life. Hopefully, this guide gave you the jumpstart you needed.
Lastly, I recommend consulting the official documentation for individuals who want to learn more about VirtualBox’s features and how to utilize them effectively.
Thanks for your time. Your feedback and comments are, as always, most welcome. Happy virtualizing!


Dec,25 Xmas. virtualbox is MIA. In trixie software repos.
Hello, is this method going to install the needed kernel modules vboxdrv, vboxnetadp, vboxnetflt with dkms? Because with Virtualbox 7.1 installed in Debian 13 the modules are compiled with vboxconfig, but when I run dkms status they are not listed there.. and so when the next kernel update happen it will break again and will have to manually fix the missing modules again.
note 2: if you get this erro when launching a VM
AMD-V is being used by another hypervisor (VERR_SVM_IN_USE).
VirtualBox can’t enable the AMD-V extension. Please disable the KVM kernel extension, recompile your kernel and reboot (VERR_SVM_IN_USE).
follow the steps provided by perplexity.ai
https://www.perplexity.ai/search/debian-13-virtual-box-amd-v-is-NNAe.NcASLGSwBxfFXNq7g
hey thanks for this tutorial.
note 1 for thos who runs linux in UEFI mode, you will need to sign the modules, this is notified into the process.
– follow the instruction, adding your country, town name etc
/!\ beware here the bios will probably ask the password in qwerty (i did used a picture to adapth the keys…)
– the reboot
– the bios will ask you to enroll the .mok
– do it it is not very complex
– the password will be prompted
– then reboot again
– relaunch sudo /sbin/vboxconfig
— message you will get when installing:
vboxdrv.sh: failed:
System is running in Secure Boot mode, however your distribution
does not provide tools for automatic generation of keys needed for
modules signing. Please consider to generate and enroll them manually:
sudo mkdir -p /var/lib/shim-signed/mok
sudo openssl req -nodes -new -x509 -newkey rsa:2048 -outform DER -addext “extendedKeyUsage=codeSigning” -keyout /var/lib/shim-signed/mok/MOK.priv -out /var/lib/shim-signed/mok/MOK.der
sudo mokutil –import /var/lib/shim-signed/mok/MOK.der
sudo reboot
Restart “rcvboxdrv setup” after system is rebooted.
There were problems setting up VirtualBox. To re-start the set-up process, run
/sbin/vboxconfig
as root. If your system is using EFI Secure Boot you may need to sign the
kernel modules (vboxdrv, vboxnetflt, vboxnetadp, vboxpci) before you can load
them. Please see your Linux system’s documentation for more information.
I was having some module sign problems because I am running my Debian in a secure mode UEFI, but beside that, nice tutorial! It helped me a lot.
Ah, it may be that I have the commercial version of the extension pack. Unfortunately, there is that download problem for debian 13 7.2 extension pack at Oracle. Don’t know how to obtain and the non-commercial 7.2 debian extension for the command line install.
VirtualBox 7.2 isn’t currently downloading properly from Oracle, so I decided to try your excellent tutorial for the command-line approach.
I followed instructions to the letter copying and pasting every line to my terminal. VirtualBox ran as expected, BUT none of the machines I already had or imported would run. “Couldn’t be opened error” is occurring. I had already double-checked the VM’s settings before attempting to run them.
A couple of earlier posts mentioned two “fixes”, but I’m mostly a newbie and I’m stuck.
Nice tutorial, thanks but beware: I couldn’t install Win11 VM on Trixie host at first, I always got an error. I had to add ‘blacklist kvm’ and ‘blacklist kvm_intel’ to /etc/modprobe.d/intel-microcode-blacklist.conf
After that it worked like a charm 🙂
Congratulations!
A truly well-written guide… detailed and beginner-friendly.
Aslo a note, that extension pack is not GPL as base product. Extension pack can only be used in business if additional license is purchased.
Hi, is it possible to add in the tutorial how to install it with the secure boot activated, thank you