Are you feeling uninspired by the GNOME experience that Ubuntu offers? Yearning for a fresh and dynamic desktop environment that enhances productivity and aesthetic appeal? Look no further!
In this article, we’ll show you how to revamp your Ubuntu 22.04 LTS system by installing KDE Plasma – a powerful and customizable desktop environment that will take your computing to a new level.
Of course, you can install Kubuntu, which includes the Plasma desktop by default, but some users prefer to stick to the original, and this guide is for them.
So, let’s dive into the step-by-step process of installing it and get ready to experience computing in a whole new light. Let’s get started!
Step 1: Update the System
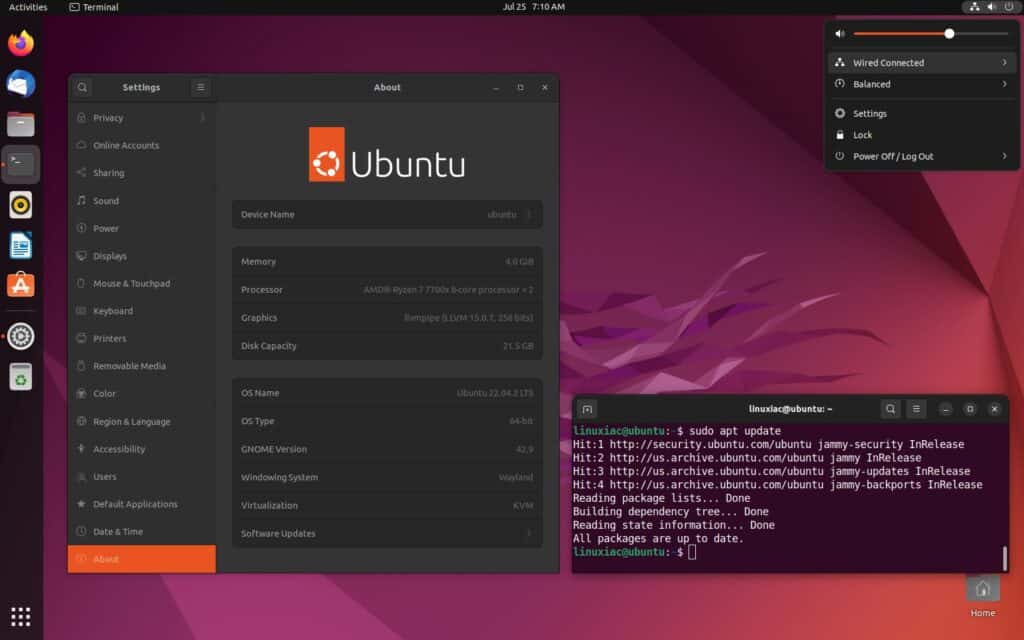
For a smooth and trouble-free installation, ensure your Ubuntu 22.04 system has no packages waiting to be updated. If there are any, install them first, reboot if required, and then proceed to the next step.
Below is our Ubuntu 22.04 system with the default GNOME desktop environment and all updates applied.
Step 2: Choose Plasma Meta-Package
The APT package manager provides a concept for so-called meta-packages. They are special “virtual” packages that don’t contain actual software programs or files but are a convenient way to install groups of related packages together.
Instead of including specific applications or libraries, a meta-package is a package that depends on others. So, when you install a meta-package, it automatically installs all the packages it depends on, effectively bringing in a collection of software and dependencies in one go.
This is the case with the KDE meta-packages from which we will install the Plasma desktop on our Ubuntu 22.04 system. The three main ones are described below. Armed with the information provided, you can choose which one best suits your preferences.
KDE Full
The kde-full meta-package includes the entire suite of KDE applications, utilities, and widgets, offering a feature-rich and complete desktop environment.
Ideal for those who desire a fully immersive KDE experience with all the bells and whistles, kde-full ensures that users can access a wide range of tools and applications for almost every task.
KDE Standard
The kde-standard meta-package strikes a balance between a complete KDE Plasma environment and a more lightweight setup. It includes KDE’s core components and essential applications, providing users with a stable and functional desktop environment.
In other words, it is well-suited for users who prefer a streamlined KDE experience without unnecessary extras. The package ensures a smooth and efficient Plasma installation while leaving room for customization and the addition of specific software as per individual preferences.
KDE Plasma Desktop
As the name suggests, kde-plasma-desktop is the basic meta-package for installing the Plasma desktop environment. It offers a minimal setup, including only the core components of KDE Plasma, such as the desktop shell, taskbar, and system settings.
This package is perfect for users who want to start with a clean slate and gradually build their KDE Plasma environment by manually selecting and installing additional applications and tools according to their specific needs and preferences.
Step 3: Install KDE Plasma Desktop on Ubuntu 22.04
We recommend using the kde-standard meta-package for the Plasma desktop installation as the most balanced choice. Run the command below:
sudo apt install kde-standard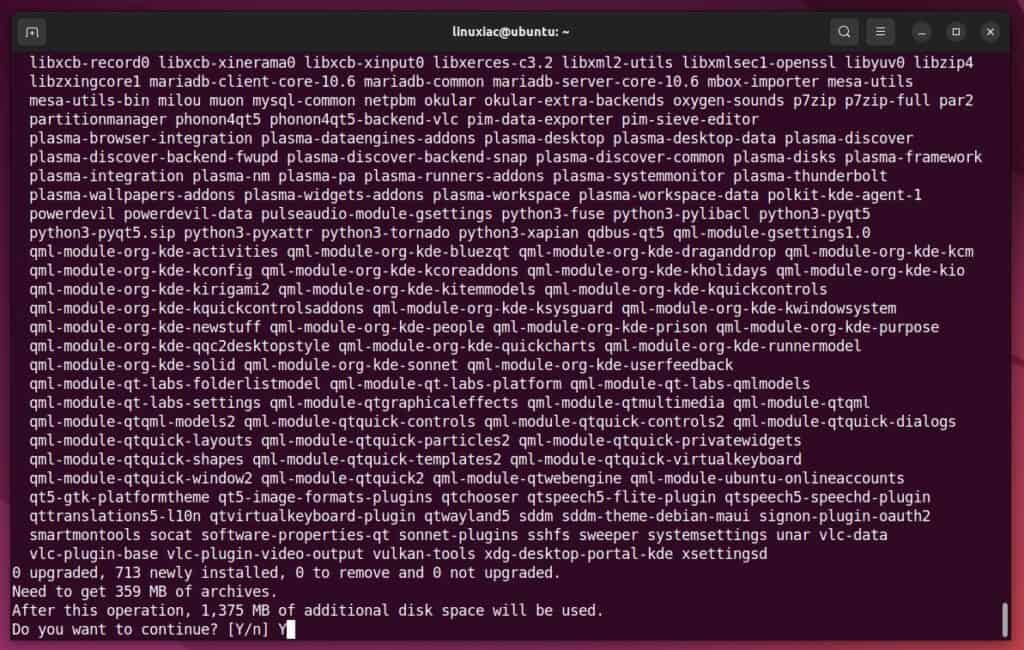
As a result, you will be presented with an extensive list of packages that need to be installed – about 1.4 GB in total. This should not bother you. Confirm, then wait for the packages to download and install.
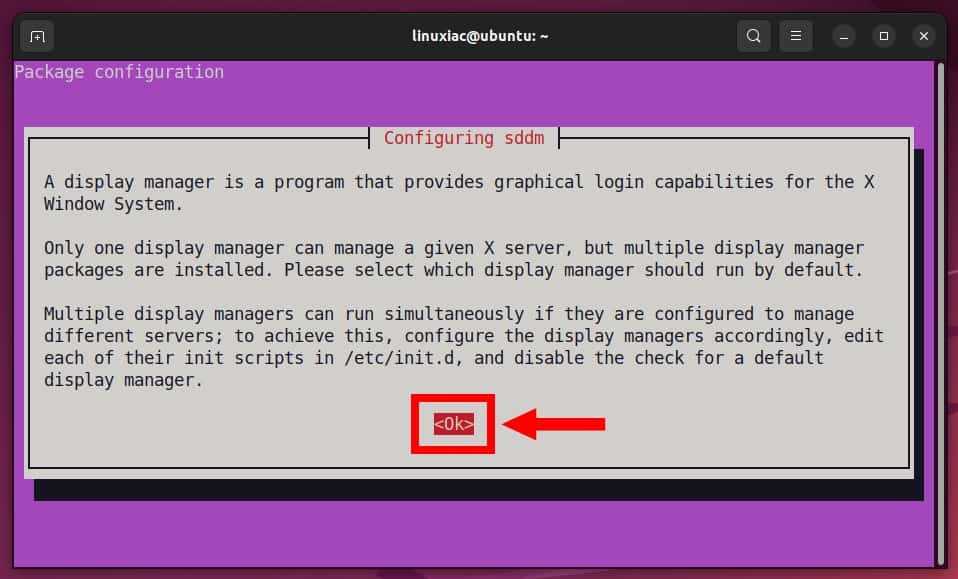
During installation, you will be prompted to configure SDDM, the default manager for the KDE Plasma desktop, which provides a graphical login screen. Just press “Enter” to continue.
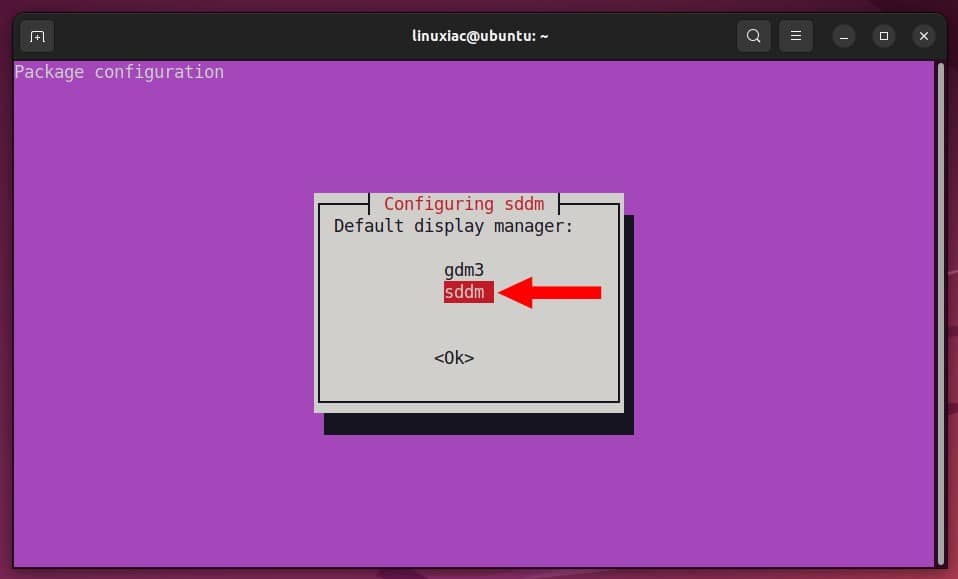
Immediately after this, the following screen will prompt you to choose the default login manager. GNOME’s current one is GDM3. However, since we are switching to a Plasma desktop on our Ubuntu 22.04 system, we will also use SDDM.
So, highlight it using the arrow keys on your keyboard and press “Enter” to confirm.
Wait for the installation to complete, then reboot the system. The SDDM login manager will greet you.
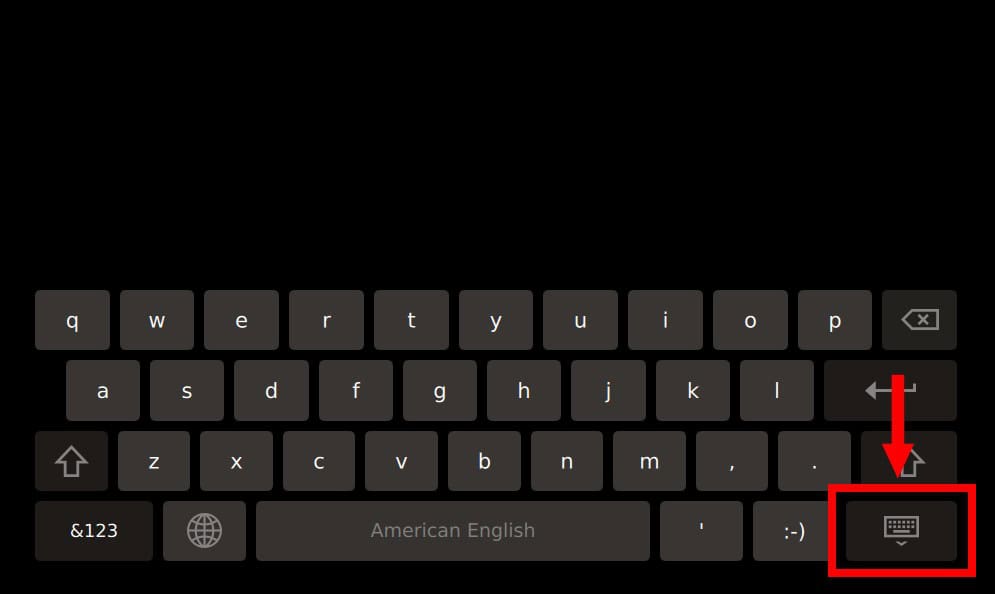
However, if you get the result shown below, don’t worry. Everything is fine. It is just the SDDM virtual keyboard. To hide it, click the button with the keyboard symbol in the bottom right corner.
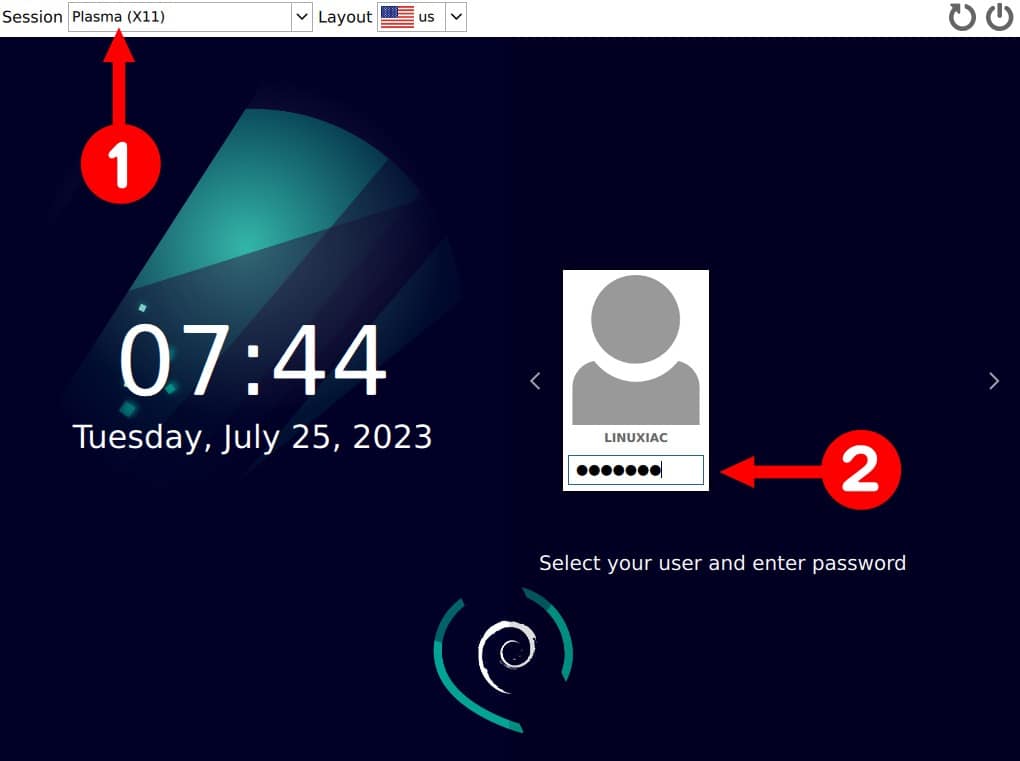
Then, choose the “Plasma (X11)” session, enter your password and hit “Enter” to log in to your Ubuntu system, which now presents you with a brand-new KDE Plasma desktop environment.
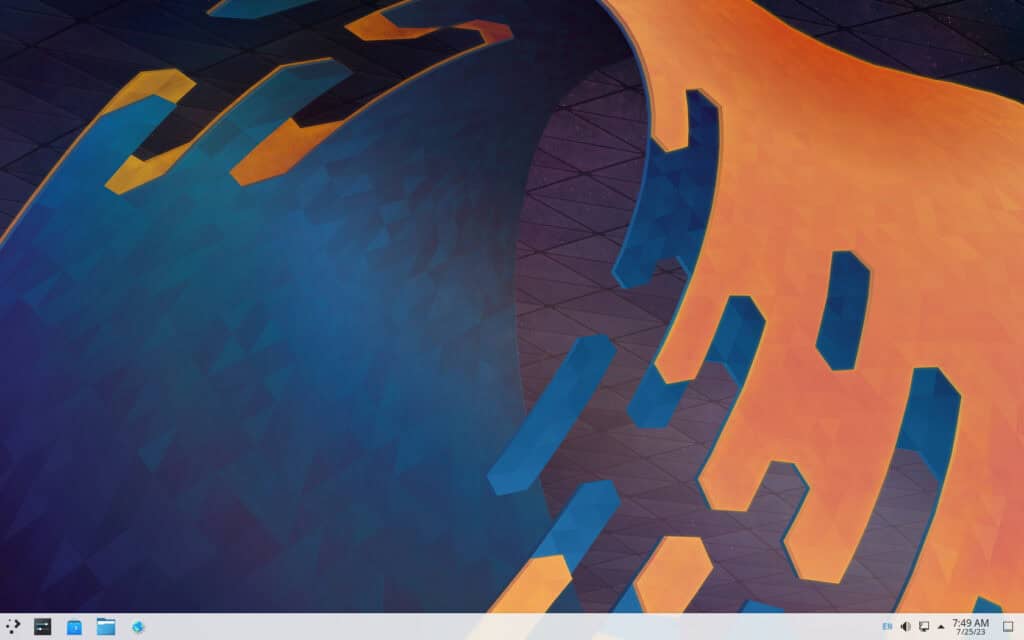
The main task has been completed – we now have a Plasma desktop installed on our Ubuntu 22.04. However, there are a few more things we strongly advise you to do to get a more pleasant Plasma experience. So, let’s take the optional steps listed below.
Step 4: Remove GNOME (Optional)
We recommend removing GNOME from your Ubuntu system if you no longer intend to use it as your desktop environment. This will reduce system clutter with unused software, save you a bunch of updates to apps you don’t use, and free up disk space.
Open KDE’s Konsole terminal emulator app and execute the following command:
sudo apt purge gnome-* gnome-shell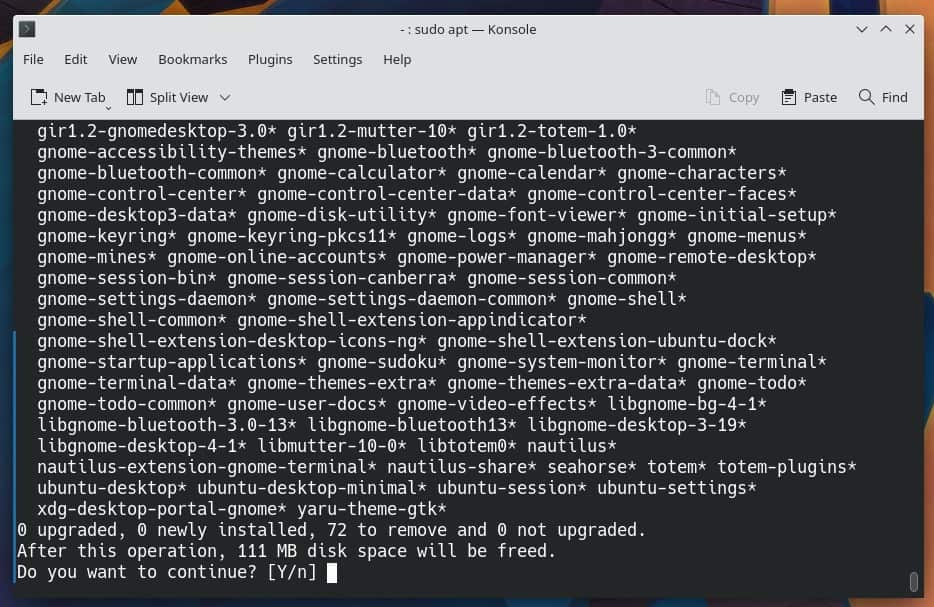
You will be presented with a lengthy list of packages that will be removed from your system. Just confirm by hitting “Enter.”
Finally, use the following command to remove any remaining GNOME package dependencies on your Ubuntu system:
sudo apt autoremove --purgeStep 5: Switch to Plasma’s Dark Theme (Optional)
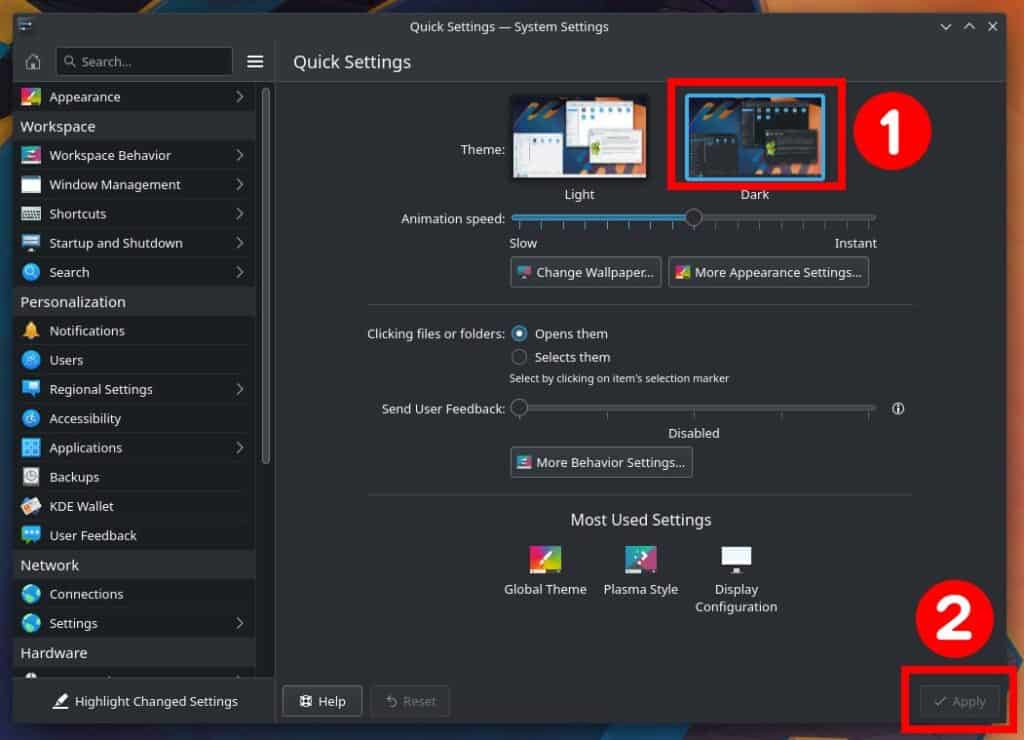
KDE Plasma’s dark theme looks excellent, so we recommend switching to it. Of course, if you prefer lighter tones, skip this step.
Open the System Settings app, choose “Dark” from Quick Settings, then hit the “Apply” button.
Step 6: Make SDDM Look Nice (Optional)
The default SDDM login manager theme could be more eye-catching. Fortunately, the Plasma desktop, known for its almost limitless customization options, allows us to install additional themes to our liking. This is what we will do next.
Open the System Settings app and select “Startup and Shutdown” from the menu on the left. Then pick “Login Screen (SDDM),” click the “Get New SDDM Themes…” button, then search for “sugar candy” in the newly opened sub-window. Once you find it, hit “Install.”
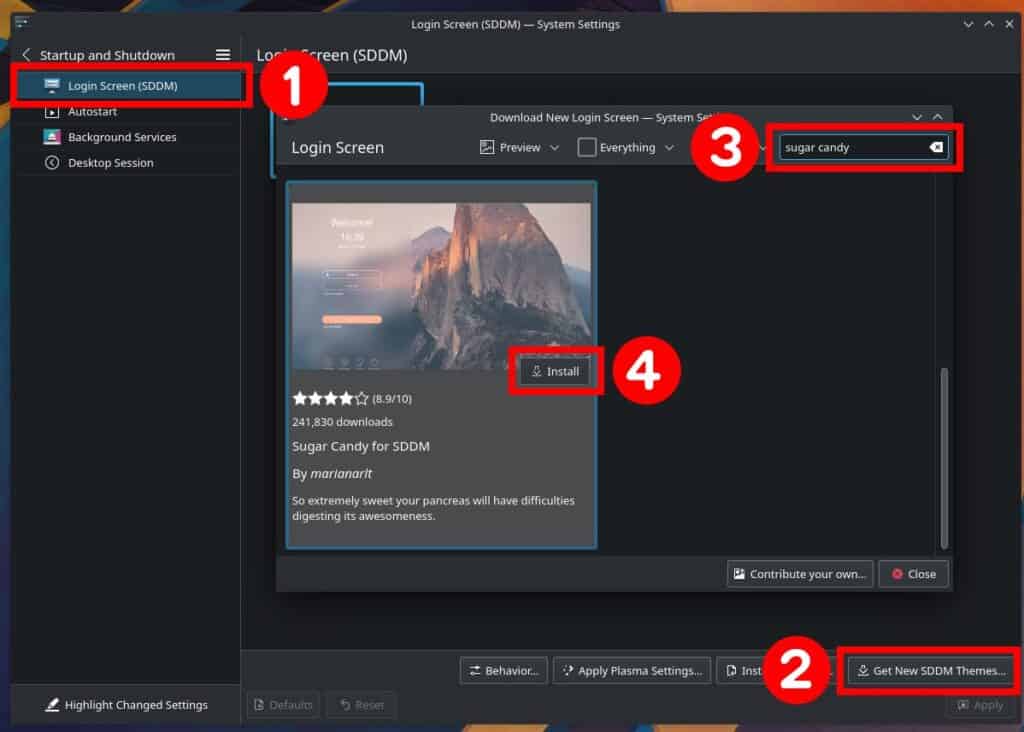
Installation takes only seconds. Once it is complete, close the sub-window. All that is left is to apply the new SDDM login manager theme and set it as the default for our Ubuntu 22.04 system.
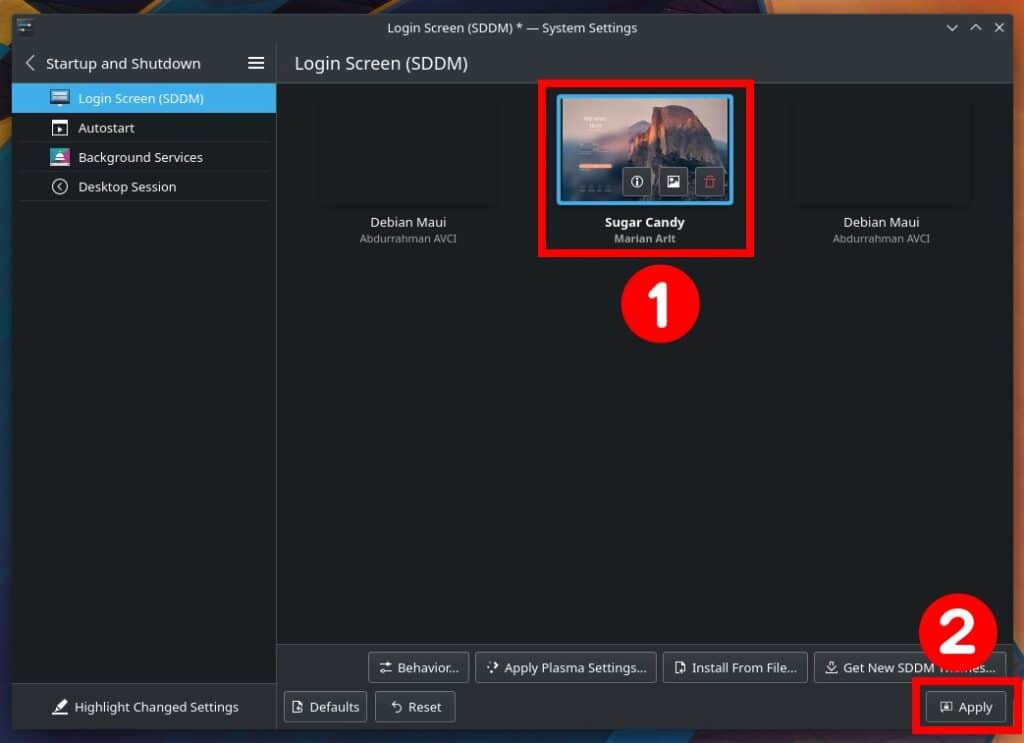
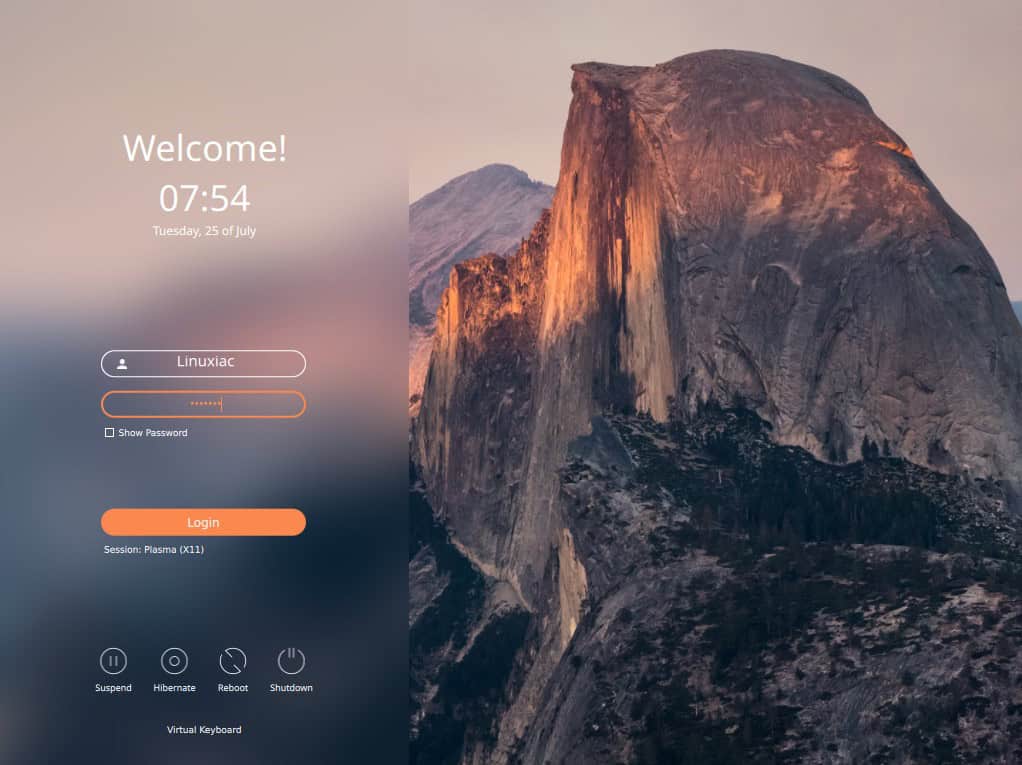
Select it from the available installed ones and press the “Apply” button. Now log out and enjoy your new SDDM’s look, which is gorgeous.
Step 7: Change the Default Icon Theme (Optional)
The final step on our journey to a complete makeover with the installation of KDE Plasma on our Ubuntu 22.04 system is to add an icon theme that will significantly change the appearance of the desktop environment, making it even more attractive.
Even though this is a highly subjective topic, we recommend installing the Kora icons as one of our favorite and best themes.
Open System Settings again and select “Appearance” from the menu on the left. Then choose “Icons,” click the “Get New Icons…” button, search for “kora,” and when your theme appears in the search results, click “Install.”
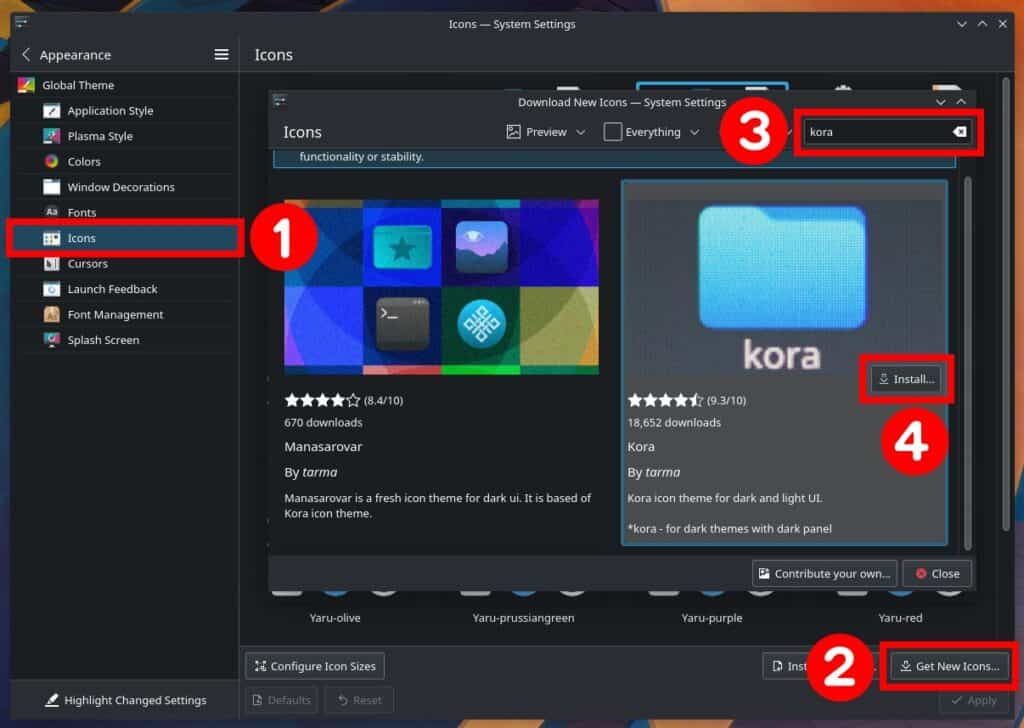
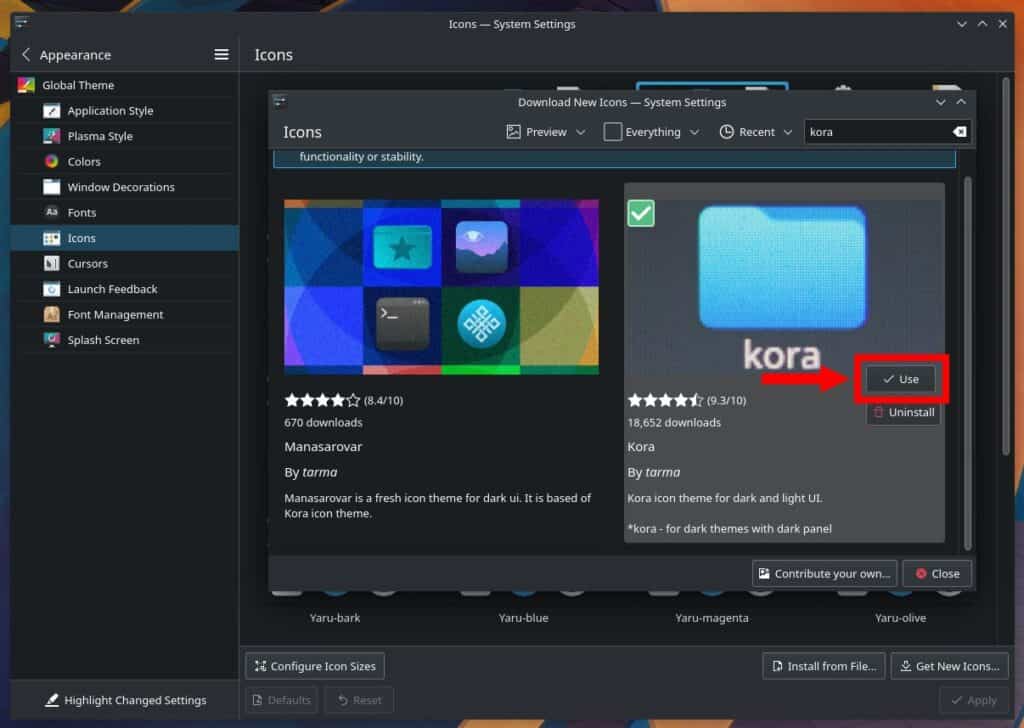
Wait for the installation to complete and press the “Use” button to apply it.
The Final Result
The transformation by installing the KDE Plasma desktop on our Ubuntu 22.04 LTS system is complete. We can confidently state that the result is outstanding and visually appealing. Enjoy it!
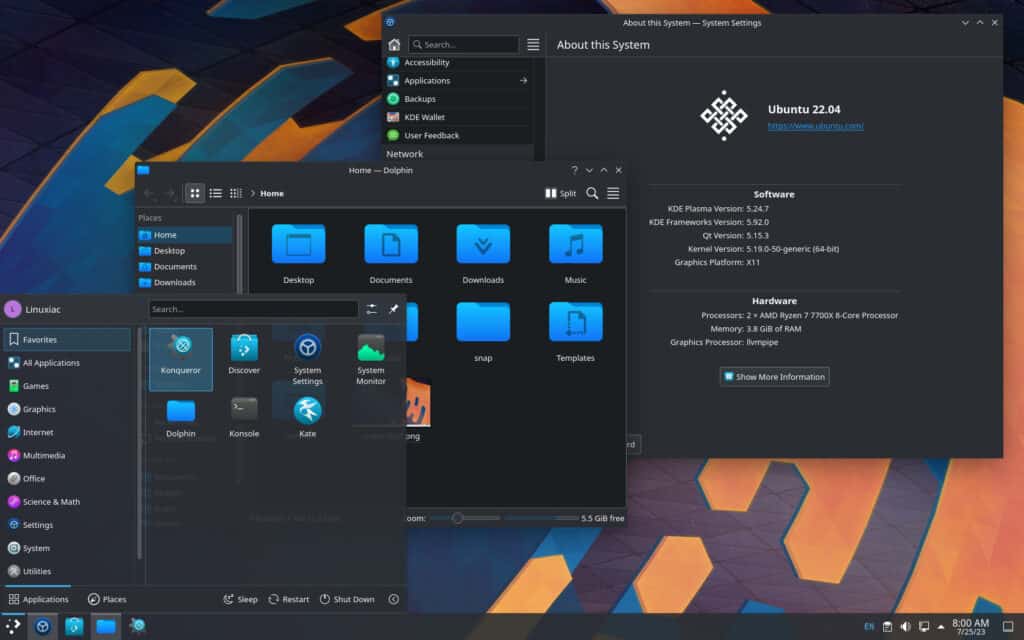
Moreover, combining Ubuntu’s stability and long-term support with KDE Plasma’s innovative and dynamic desktop environment ensures a reliable and enjoyable computing journey.
If you’re ready to embark on it, don’t hesitate to follow the installation guide and experience the magic of KDE Plasma on Ubuntu. Expand your horizons and unleash the full potential of your Ubuntu system with Plasma’s captivating features and functionality.
Thanks for your time! Your feedback and comments are most welcome.

I have done this with a open box child linux. From both command line and synaptic. It is a very good way to learn. Also a bit fun. Just use that old system to learn on is the best.That way if thing’s foul-up– so what you are just play-learning.