If you’re looking to run containerized applications effortlessly on your Linux Mint 22 system, Docker Desktop is the ideal tool. It simplifies managing containers by providing a unified platform with a user-friendly interface, Docker CLI, and other essential tools like Docker Compose and Kubernetes—all bundled together.
At the same time, pure Docker (here’s our guide on installing it on Mint 22), which refers to the standalone Docker Engine and CLI tools, is often used primarily on Linux servers. It provides more control and is lightweight, but its learning curve is much higher.
In this guide, we’ll show you how to install Docker Desktop on Linux Mint 22, enabling you to take advantage of its streamlined interface and powerful container management features.
System Requirements
To install Docker Desktop successfully on your Linux Mint 22 system, it must match the following requirements:
- 64-bit kernel and CPU support for virtualization.
- At least 4 GB of RAM.
- KVM virtualization support.
- QEMU must be version 5.2 or newer.
- A desktop environment with system tray support.
Additionally, it is important to understand that Docker Desktop runs a Virtual Machine that creates its own Docker context.
In other words, containers deployed on your Linux host before installing Docker Desktop will not be available in the app, so you’ll have to redeploy them through it to be able to manage them through Docker Desktop.
Step 1: Add Official Docker Repository
I’ll clarify immediately – to install Docker Desktop on Mint 22, you essentially need to install a single DEB package. However, if you quickly download and try to install it without first adding a Docker repository to your system, you’ll face an error due to missing dependencies.
Specifically, the message states, “The following packages have unmet dependencies: docker-desktop : Depends: docker-ce-cli but it is not installable“
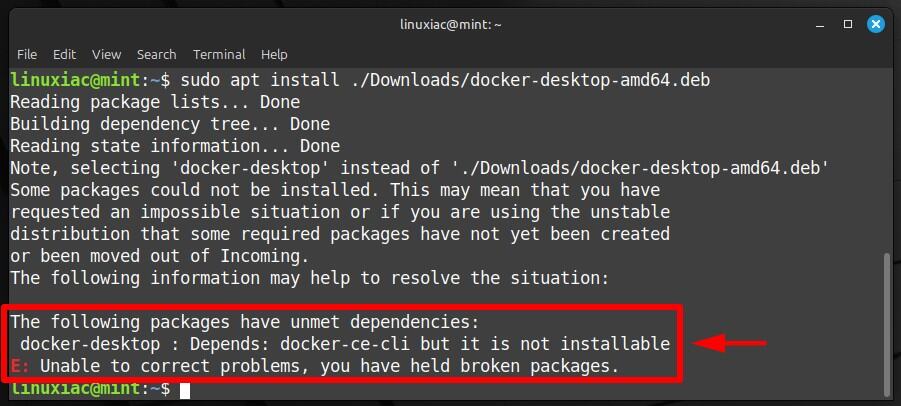
In other words, Docker Desktop needs the “docker-ce-cli” package installed (or available for installation) on your Mint 22 system. So, we’ll first add the official Docker repositories where the package is available to our host. This way, when we install Docker Desktop, all the necessary dependencies will be met.
Run the commands one after another in the order shown below to do it:
sudo apt install apt-transport-https ca-certificates curl gnupg
curl -fsSL https://download.docker.com/linux/debian/gpg | sudo gpg --dearmor -o /usr/share/keyrings/docker.gpg
echo "deb [arch=$(dpkg --print-architecture) signed-by=/usr/share/keyrings/docker.gpg] https://download.docker.com/linux/ubuntu noble stable" | sudo tee /etc/apt/sources.list.d/docker.list > /dev/nullCode language: Bash (bash)
If you look closely at the third line, it’s adding the Ubuntu 24.04 LTS Docker repository to your system. This is perfectly fine because Linux Mint 22 uses Ubuntu 24.04 LTS “Noble Numbat” as its foundation, so it shares the same package base.
Next, refresh the repository index; as you can see, the Docker repo is ready for use. So when you install Docker Desktop in the next step, the required package dependencies will be downloaded from it, thus ensuring a seamless installation.
sudo apt updateCode language: Bash (bash)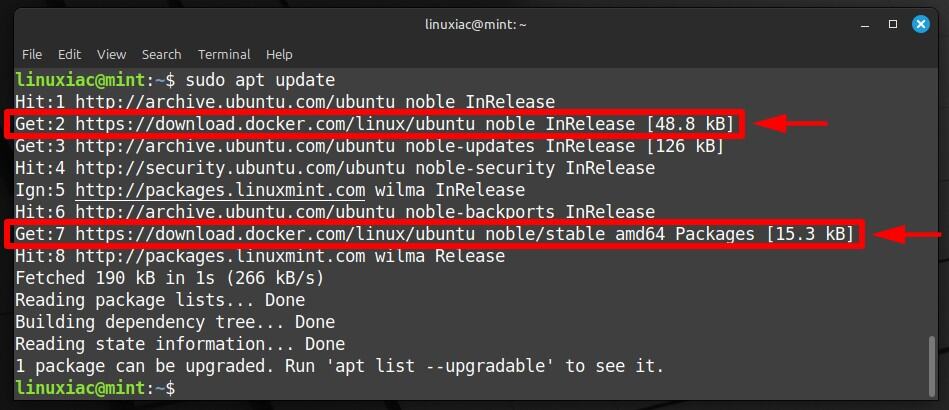
Step 2: Download Docker Desktop
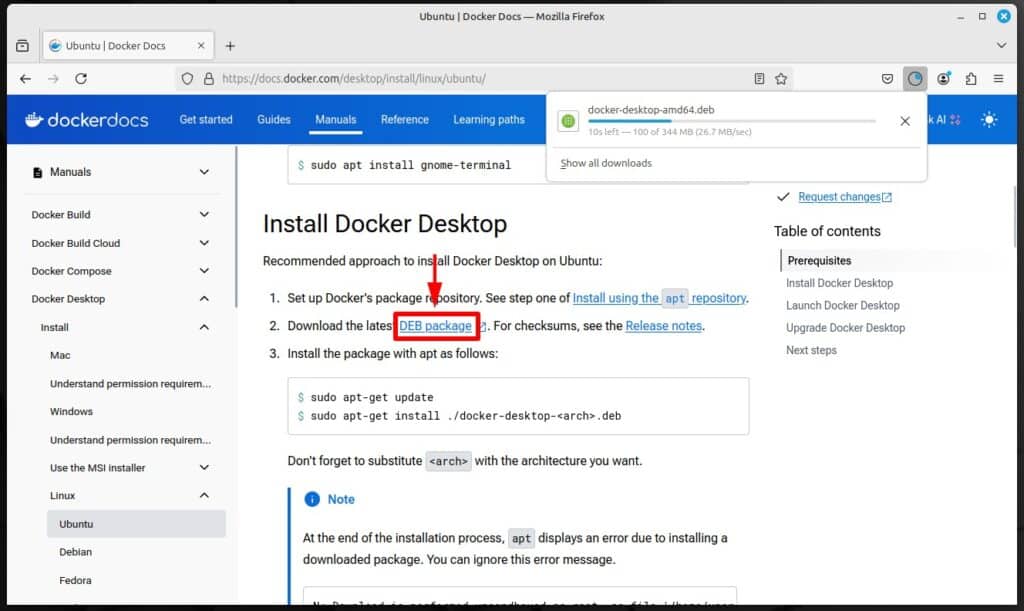
Now point your browser to this address and click the “DEB package” link to download the Docker Desktop installation package.
Step 3: Install Docker Desktop on Linux Mint 22
So, everything is ready. The last step is to install the DEB file we downloaded. To do this, use the command below, but remember to change the file path if you downloaded it to a different location on your Mint 22 system.
sudo apt install ./Downloads/docker-desktop-amd64.debCode language: Bash (bash)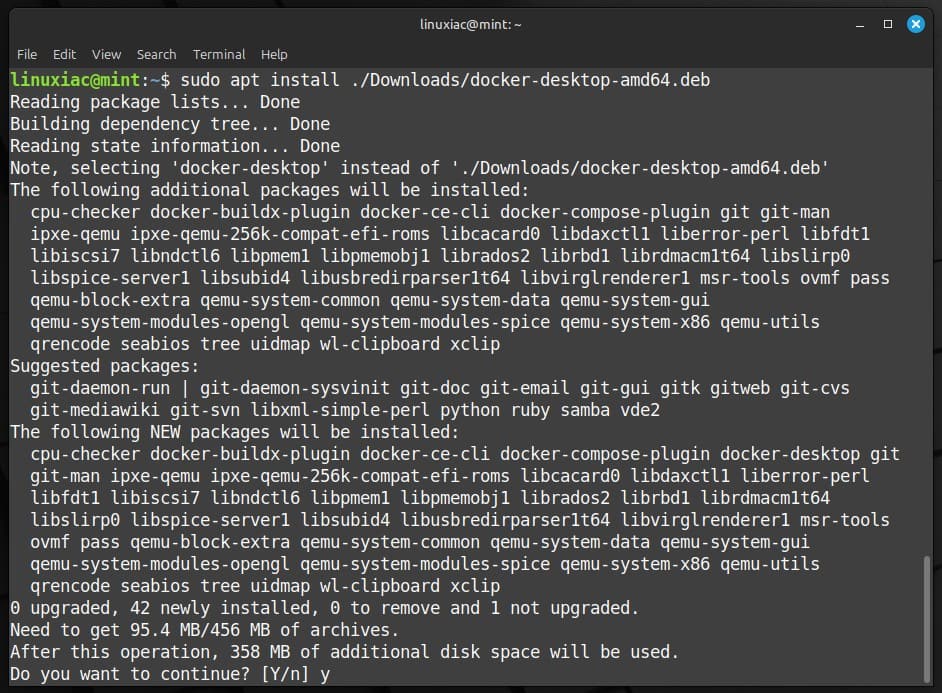
Wait for the necessary packages to be downloaded and installed; the process will not take more than a minute.
Step 4: Run Docker Desktop
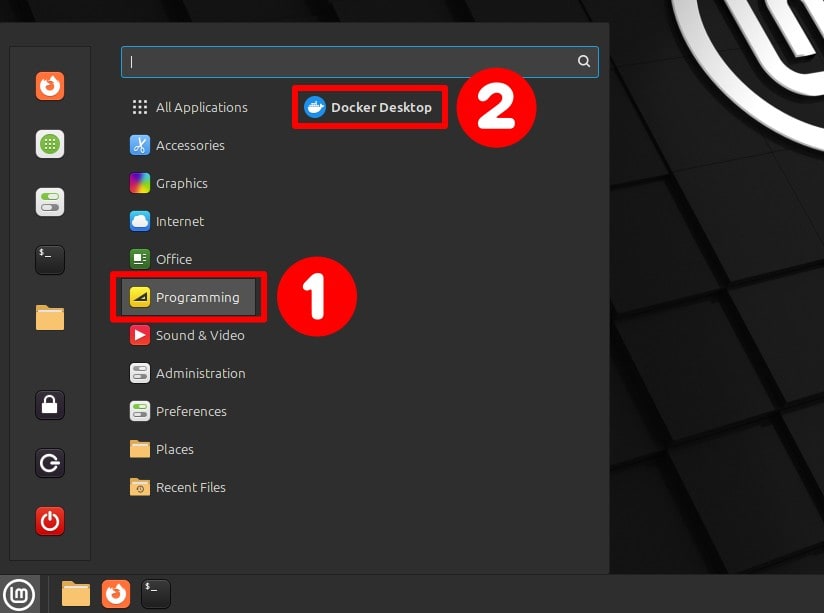
Congratulations, we’re done! Launch Docker Desktop from the start menu; it’s in the “Programming” section. When its icon appears, click to run it.
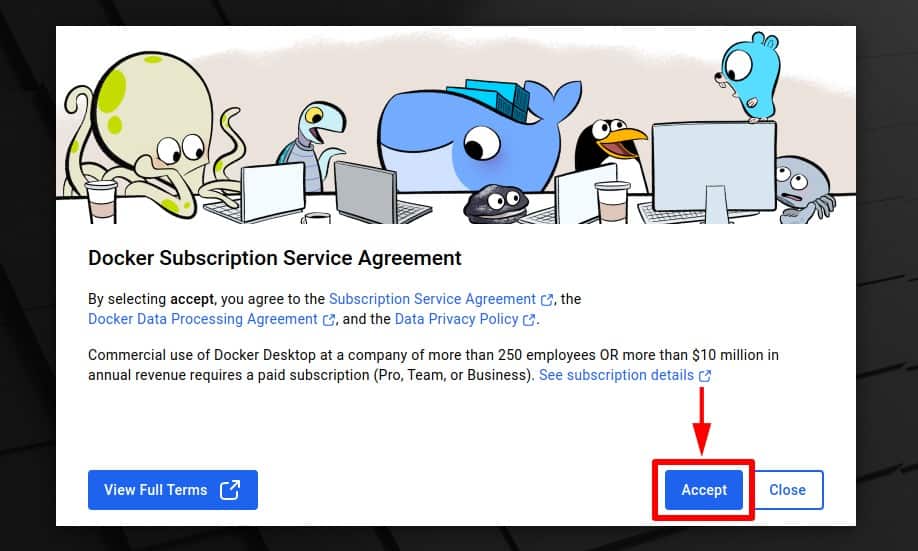
You will be greeted by the “Docker Subscription Service Agreement.” Click the “Accept” button.
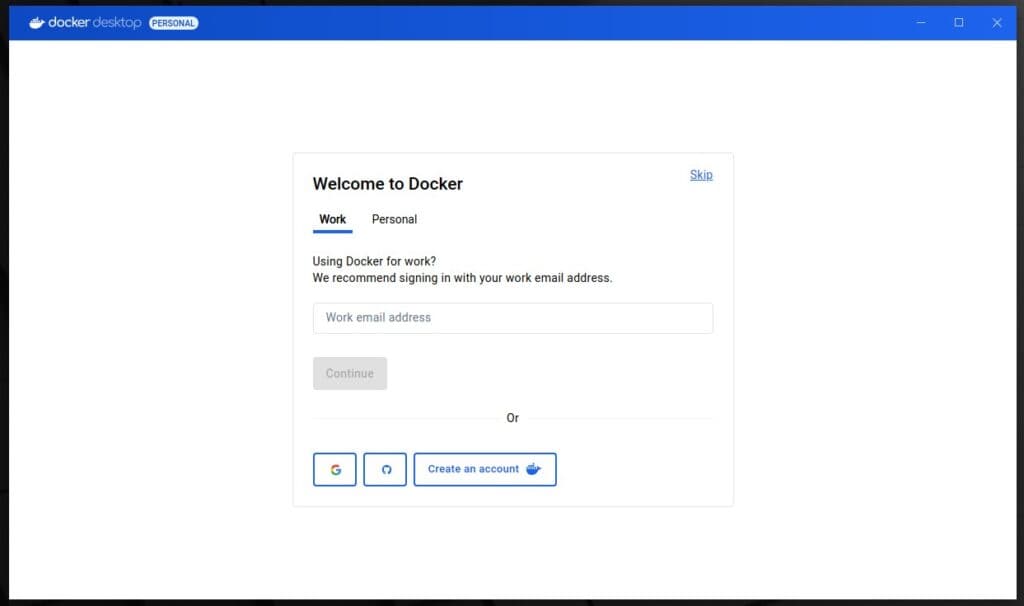
You can log in on the next screen if you have Docker Desktop subscriptions. If not, just click the “Skip” link.
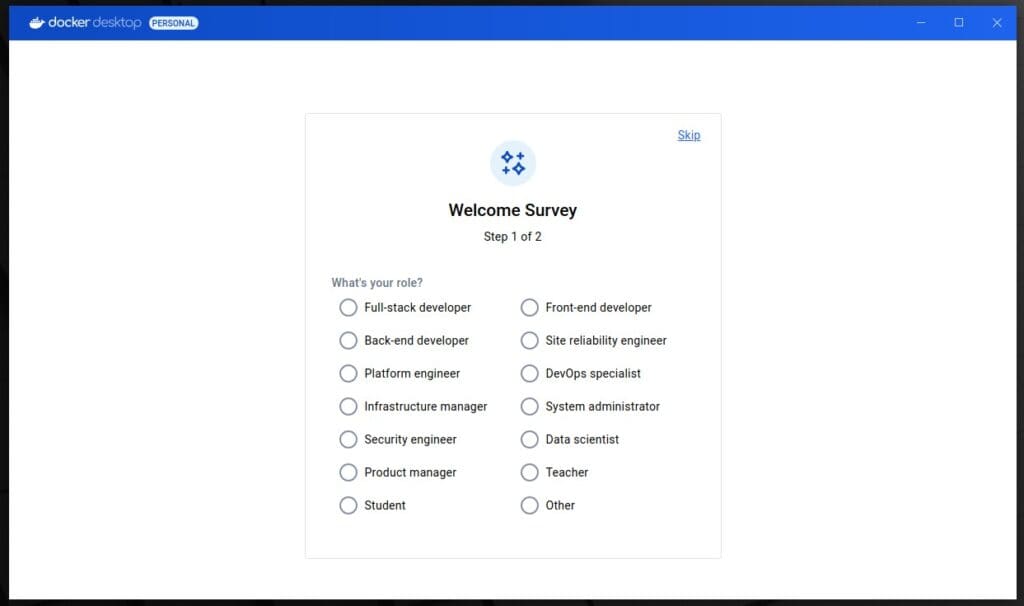
We’re almost set. Docker has a quick survey to learn more about its users. You can participate by answering it briefly or clicking the “Skip” button again.
And that’s all! You’ve successfully installed Docker Desktop on your Linux Mint 22 system, and you’re all set up to bring all your containerization ideas to reality. You can also manage the application itself through the system tray icon.
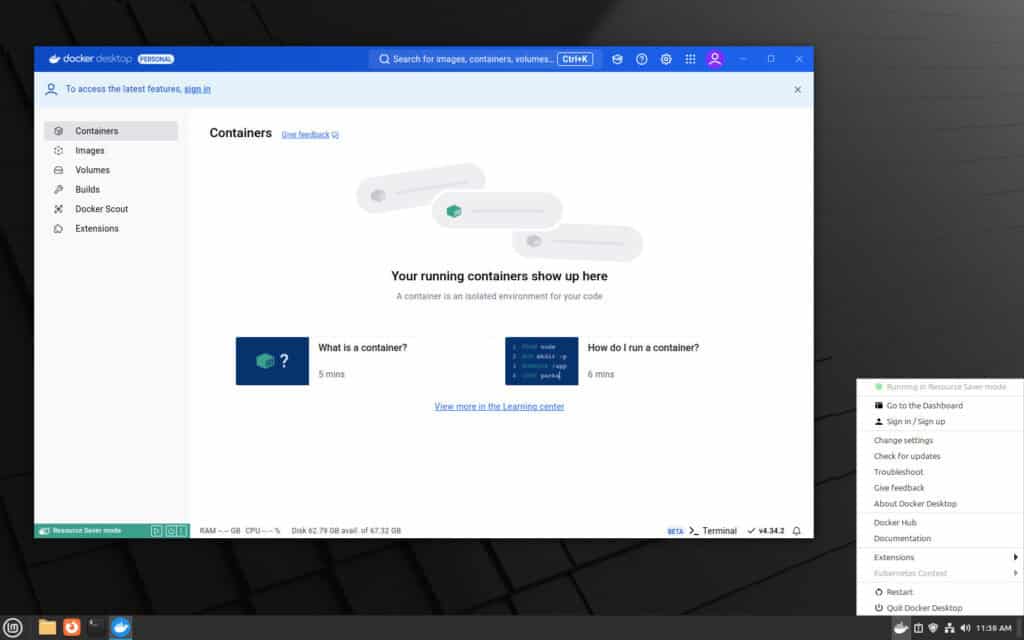
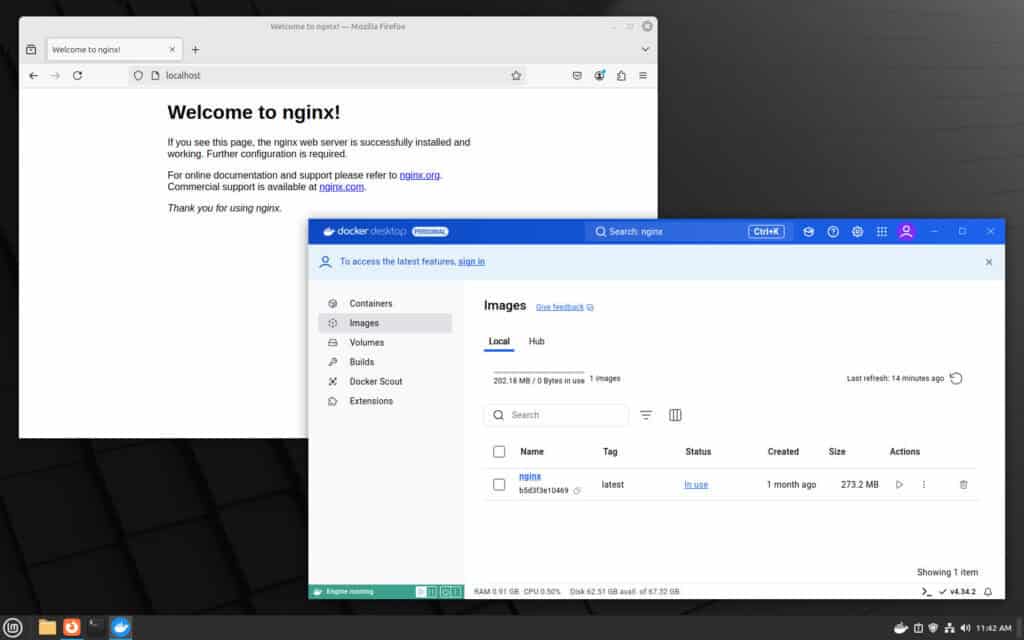
So, what are you waiting for? With Docker Desktop’s convenient graphical interface, working with containers is a real pleasure and ease. I’m sure you can’t wait to start trying out its capabilities, but just one last thing before that.
Docker Desktop has a feature that lets it start when you log into your computer. You can find this option in “Settings” > “General” > “Start Docker Desktop when you log in to your computer,” but unfortunately, it does not work under Linux.
But don’t worry! Linux Mint offers a simple solution to set up applications to start automatically upon login. We’ll use this method to ensure Docker Compose starts automatically, avoiding the hassle of starting it manually each time. Here’s how.
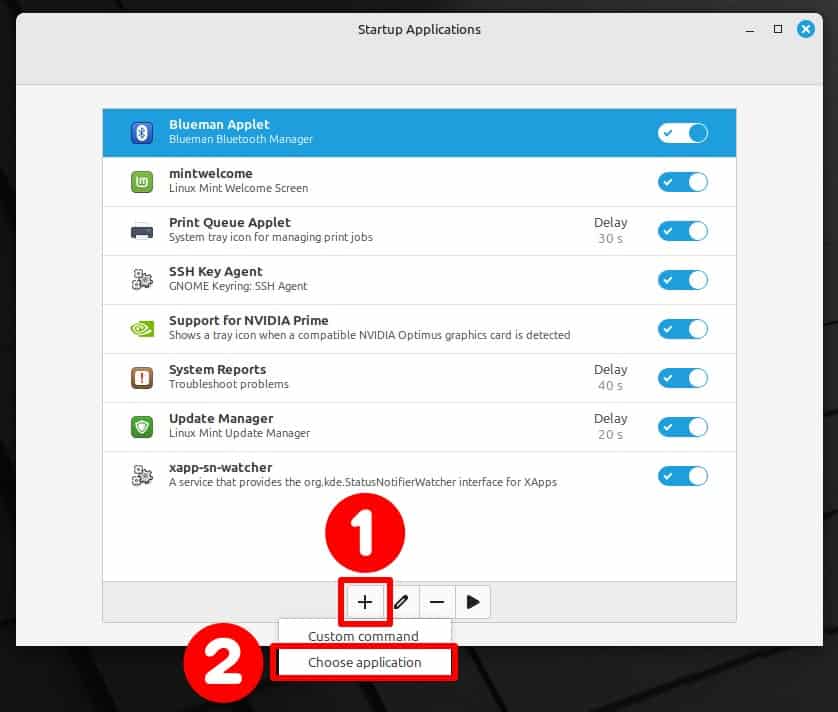
In Mint’s Start main menu, search for “Startup Applications.” Open the app, click the “+” icon, and pick the “Choose application” option.
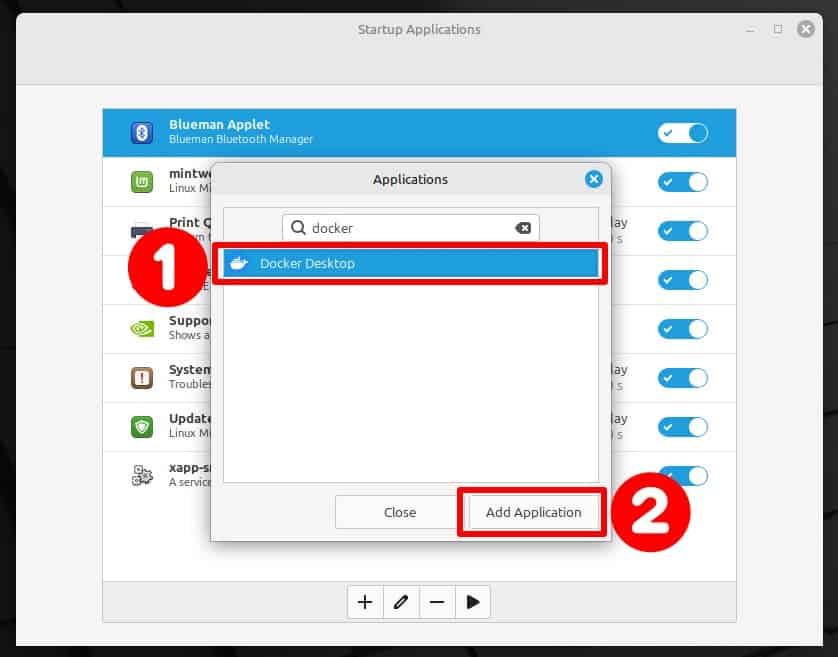
Next, search for “docker” and click on the app once it appears. Then, click the “Add Application” button to confirm. So, next time when you log in again to your Linux Mint 22 system, Docker Desktop will automatically start up.
Bottom Line
As you can see, installing Docker Desktop on Linux Mint 22 with the proper instructions is relatively straightforward.
Whether setting up a development environment, running containers for testing, or deploying applications, a robust platform tailored for these tasks will get you all set.
For more in-depth knowledge about using Docker, visit its documentation or navigate to the official Docker Desktop manuals.
Thanks for using our guide! Feel free to share your thoughts in the comments section below.

This was really helpful, thank you so much!
Thank you very much, this detailed guide is excellent and got me up and running right away. As a very recent migrant from Windows, I really appreciate the help.